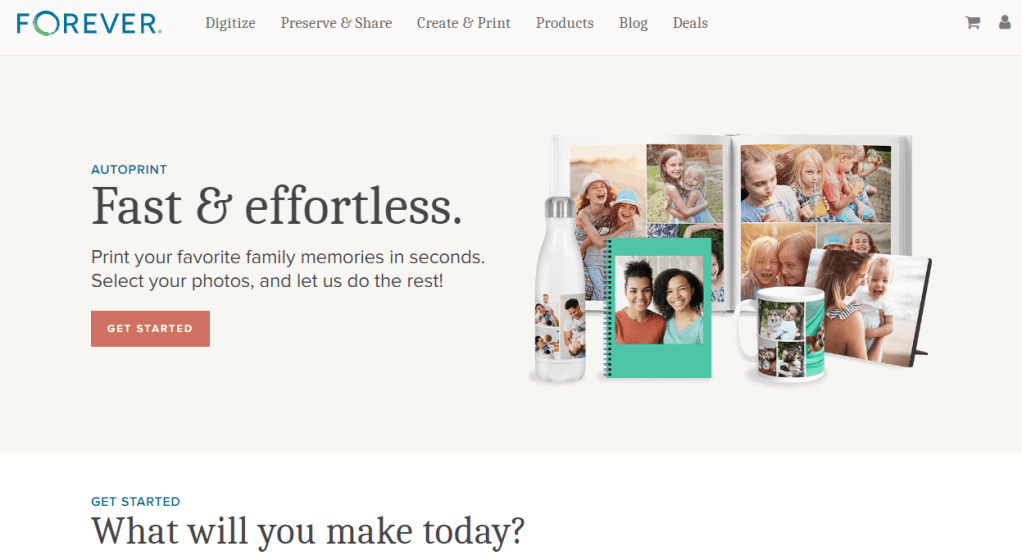
Last month I walked you through a couple of easy, peasy AutoPrint projects step-by-step. AutoPrint is what you want to use to create very quick projects. The layouts are very simple and while you can make some edits, the primary goal is done.
Design & Print is the next level of (shall we say) fussiness. You want more in the way of decoration and more opportunities to add your own touches, but you also want the heavy of lifting of design to have been done by someone else.
Available Projects
While AutoPrint and Design & Print offer many of the same projects for you to choose from, there are some differences. I have compared the AutoPrint Offerings with the Design & Print Options.
Photo Books (In AutoPrint you have all these choices with each photo boo. In Design & Print, options for size, binding and style depend on design chosen, but all of these can be found in various designs.)
Sizes 8X8 -12X12
Softbound & Hardbound
Standard & Layflat
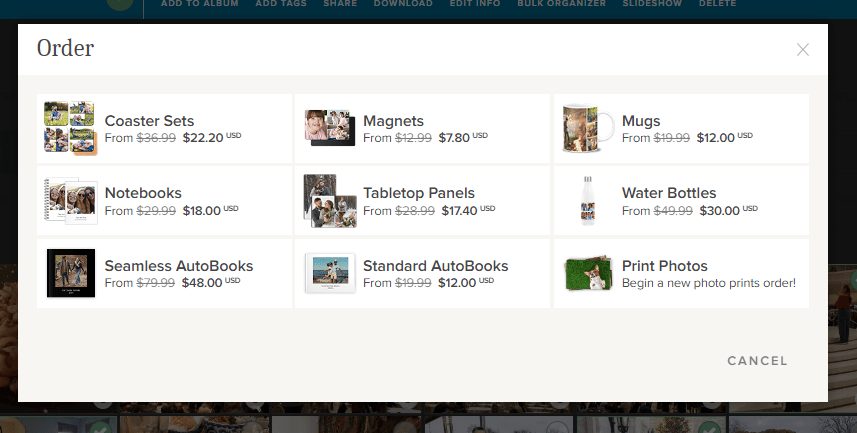
Photo Gifts (Varies)
Coaster Sets (Both)
Tabletop Panels (Both)
Notebooks (AP Only)
Magnets (Both)
Ornaments (D&P Only)
Puzzles(D&P Only)
Blankets (D&P Only)
Drinkware (Varies)
Water Bottles (Both)
Photo Mugs (Both)
Frosted Glasses (D&P Only)
Wall Decor (D&P Only)
Canvas Prints
Metal Panels
Cards (D&P ONly)
Calendars (D&P Only)
Photo Prints (AP Only)
Glossy & Lustre
Sizes 4X6 – 11X14
Selecting Your Photos and Your Design
When you have a project you want to do in Design & Print, I suggest you first go to your albums and set up one for the project. Then add all the photos you want to include in your project into the album. It’s also a good idea to get them into the order you want them to be in the project. This will not only get you prepared for making the project, but it could help you decide which design to use.
Then it’s time to choose the design for your project. According to your point of view, this part is either your favorite thing about the project or your biggest headache.
If you like shopping online, this part is fun. You can go in and browse around, checking available options for size, style, material and etc.. You can put together your whole project and then decide you want to change the design or the layout. You’ll love it.
I’ll admit it makes me a little crazy. In prepping for this post, I went in to find a coaster set project to walk you through and hit a brick wall. Artisan is my favorite way to design in FOREVER because I like to start with a blank page, but many people find a blank page daunting. They want a design template. FOREVER offers three design options because different people like different things.
Let’s Make a Blanket
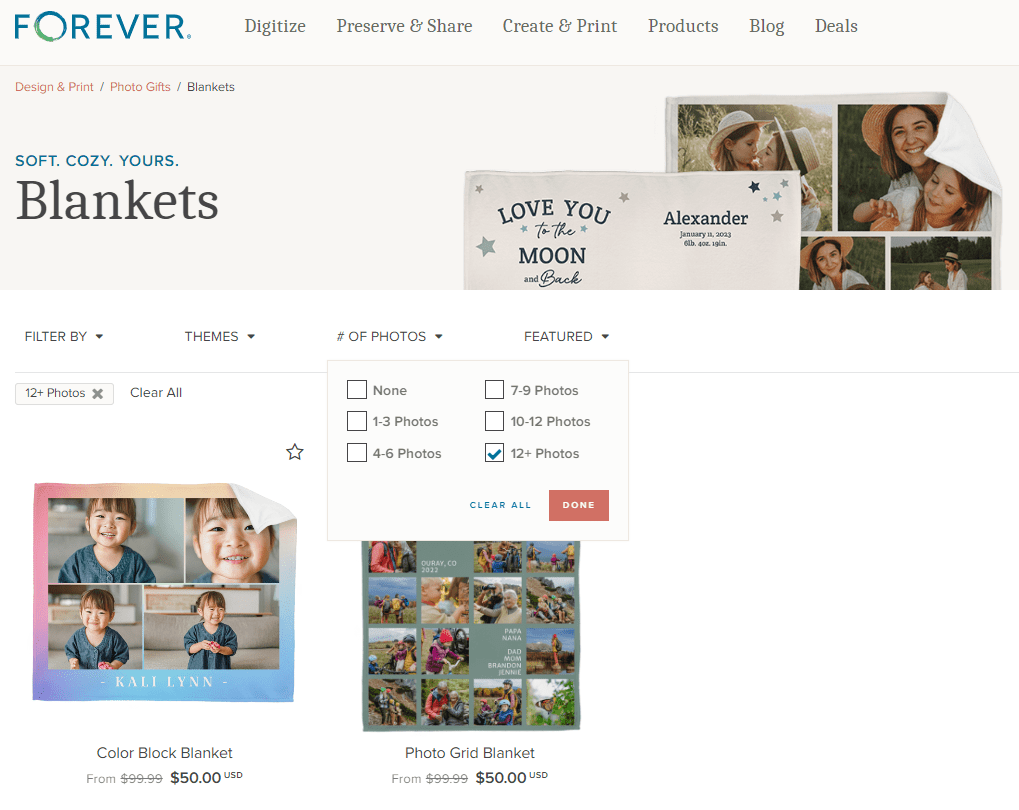
Since I’m definitely not in the mood for coasters, let’s make a blanket. I’ll use the photos I have tagged as Floral for the images on the blanket. On FOREVER I would hover over the “Create & Print” Tab and a selection box comes up offering AutoPrint, Design & Print and Digital Scrapbooking & Deign. Under Design & Print, Photo Gifts are in the center and Blankets are at the bottom of that list. Click “Blankets.”
There are many, many design to choose from, but for this project I wanted to include as many floral photos as possible, so I used the “# Of Photos” filter to find the blanket designs which included the most images. I got two choices. (Ignore the pricing. The image I included shows the deals available on the day I wrote this post, not the day you are reading it)
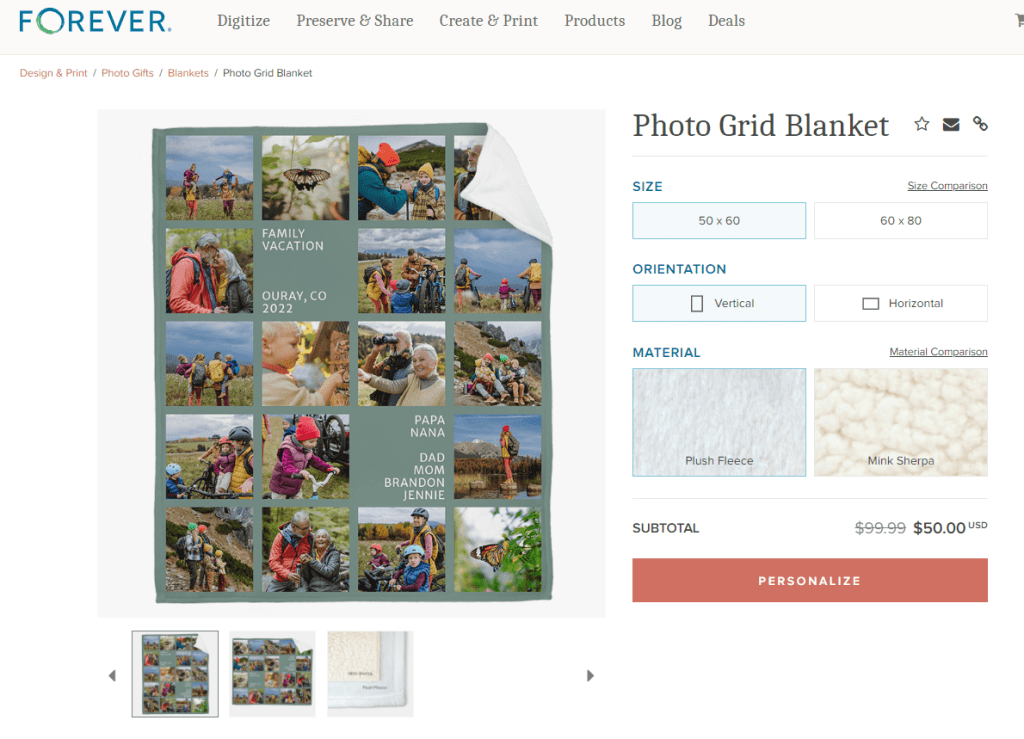
When I clicked on the Photo Grid Blanket, here’s the screen I got. It advises me of all the options I have. There are two sizes, two orientations and two materials available to me and there is a big PERSONALIZE button. Let’s do that.
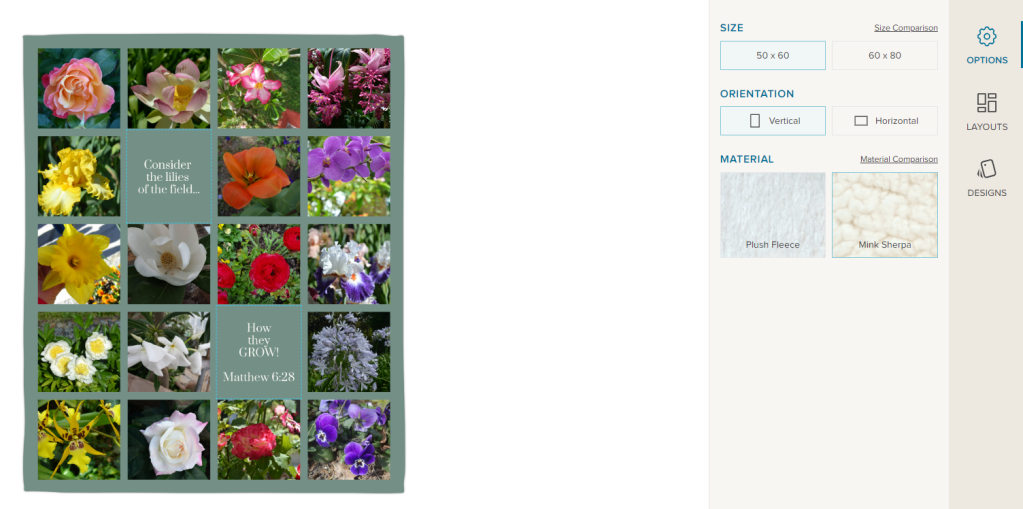
So, I went in and added a photo for each space and chose a Bible verse as my text. If I clicked on “Layouts,” the designer offered four options, but this was the one with the most spaces, so I chose it. I could still select my size, orientation and material. Then I could add it to my cart and order it!
There are no hard and fast rules for creating albums in your FOREVER storage. You determine how you want them set up. You can set them up based on the subject matter, the time frame or the people. You can have as many or as few albums as you want and you can nest albums under the top level album for as deep as you’d like.
Some people keep photos strictly by date – with each year being an album, with nested albums for each month inside that and then an album for each day/event within the month. Others focus more on families, having one album for their immediate family, one for their own extended family and another for their spouse’s family. Perhaps the nested albums inside that would be by years or it could be broken down by people.
My choice is to have one album for travel and another for day-to-day activities. In the travel album, I have an album for each vacation. In my day-to-day album, the nested albums actually correspond to the various traditional scrapbooks I have created on a annual basis, but according to the scrapbook, it could be one year or multiple years. Then I have an album for all my completed FOREVER Projects and another for my Memory Keeping business.
I’m sorry this post is so long, but I wanted to include all the pertinent information in the same place and there’s a lot of it.
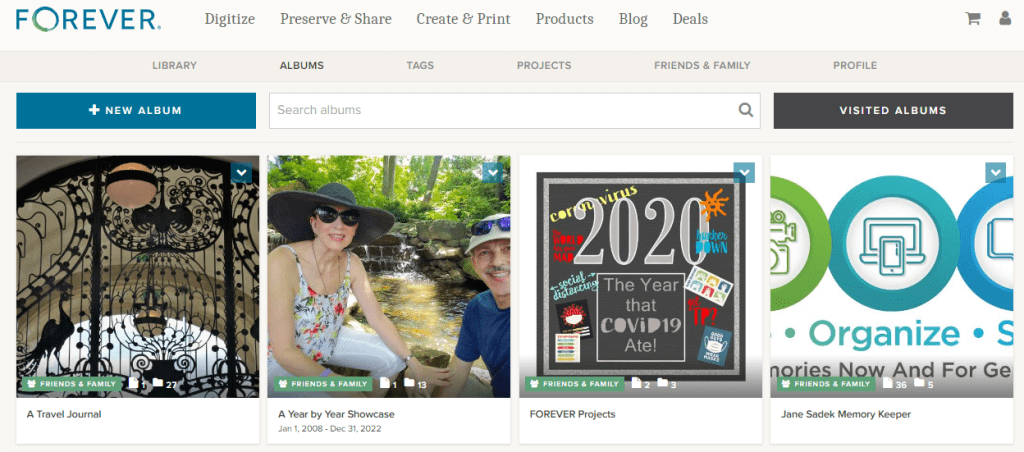
The Top Bars
Looking at my album page above, you can see that it’s easy to access any place on the FOREVER site with the click of a button. Click “FOREVER” and you will be on the FOREVER Home Page. You can shop FOREVER by clicking Digitize, Preserve & Share, Create & Print, Products or Deals. “Blog” will take you to the FOREVER Blog, which has an encyclopedic reference library of posts dealing with everything from new products to how-to’s. You can go to your shopping cart and also take a look at your account.
In the row below that, you have access to your Library, your Tags and your Profile. There’s also a link to your “Friends & Family.” Friends & Family are the folks you have chosen to share your photos with. We’ll talk about that more later.
Finally, you get to items specific to Albums. You can add a New Album, Search the Albums you have or take a look at Visited Albums. We’ll take a deeper look at Visited Albums later, also.
In the middle of the bar below these options is a Search Bar which allows you to use keywords, names and such to find specific images in your storage.
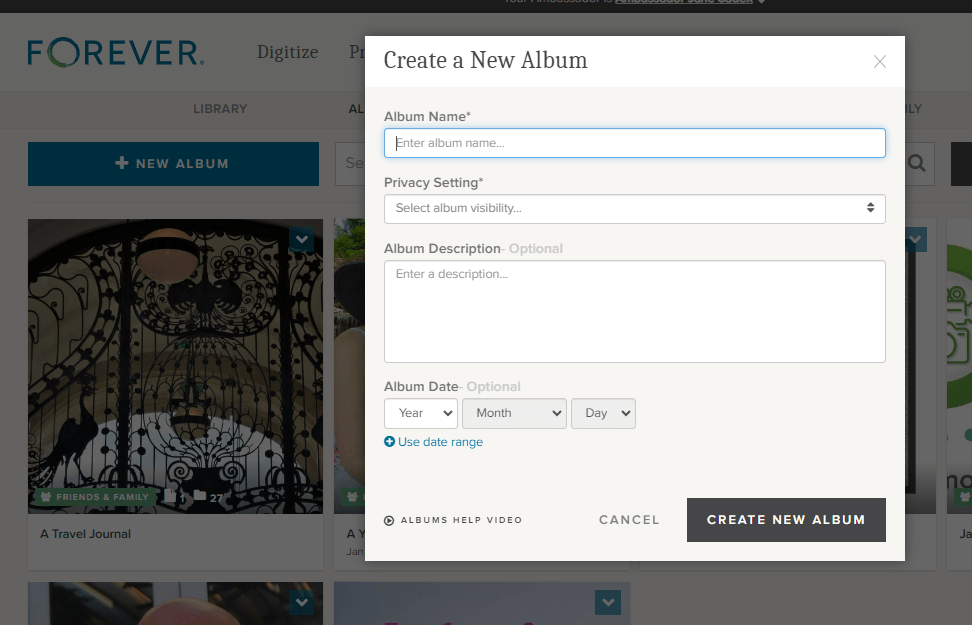
+ New Album
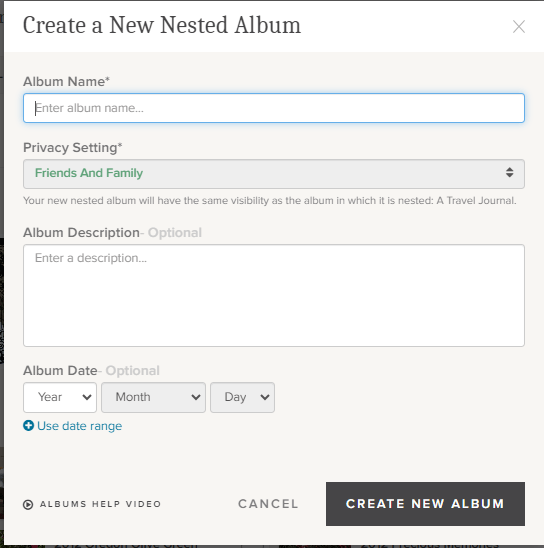
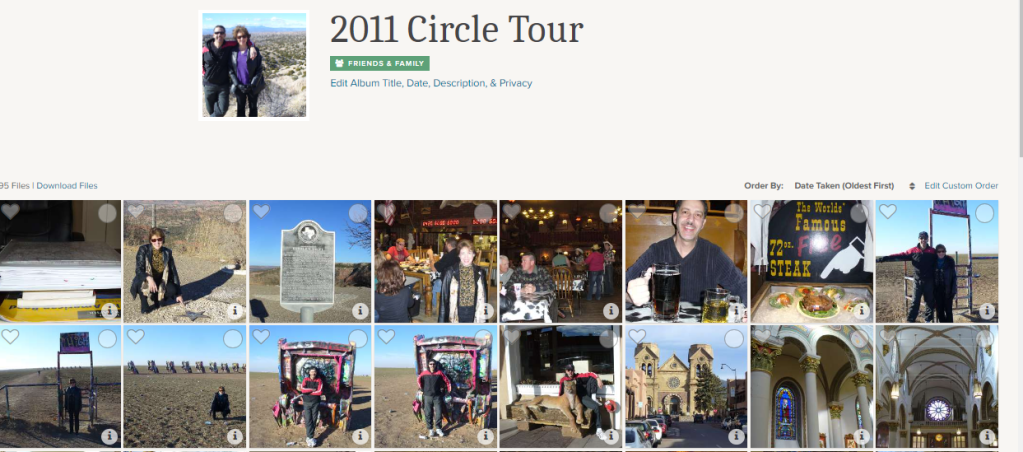
Hit the blue “+New Album” button and this “Create a New Album” dialog box will pop up. “Album Name” is the title you want for your album. You must create this name and it will show up below the photo you choose as a cover image for your file. For instance, below the photo with the ornate iron gate, I named my album “A Travel Journal.”
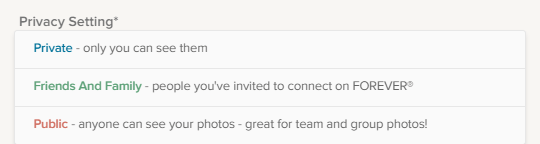
There are three Privacy Settings available and you must select one for each album. This will indicate who can see these albums in your storage. The privacy setting you chose for the top level album will apply to all the nested albums.
“Private” means for your eyes only. The only people who will be able to see these files is you, someone you have allowed to sign in with your credentials or anyone you have designated as a manager for your account, if you have chosen for your manager to have that sort of access. You can create a link and share the file, but it will not automatically be available to anyone else unless you decide to.
“Friends and Family” are people you want to have access to the images in your storage. They are completely under your control. You can invite them when you want to and take them out of Friends and Family at your discretion. However, if you would like for them to collaborate on an album with you, you must share the file with them, using the “Share” button. Then they can add photos to a file, but they still cannot modify the photos. They would need to be a manager for that.
“Public” means your files are accessible to anyone on the internet. This is not what most people want, but it could be what you want. You could set up a portfolio of projects you wanted the public to have access to or training films for your customers or even, like one of our users, a historical album of his service in WWII. The WWII Vet did not have any family who was interested in his photos, but he thought they had historical significance, so he wanted them to be available to anyone who was interested.
“Album Description” gives an overview of what’s in the album. You don’t have to put anything here, but if you are giving access to other people or you are setting up an archive which will be used for generations to come, then the more you include the better.
“Album Date” can be a single date or a date range. You do not need to fill this in at all, but as with the description, this information could be invaluable to future generations.
So, remember when I said you could share your albums with others and allow them to collaborate in those albums. There are a wide variety of uses for this feature, from a network of family albums to a team, club, business or other organization which uses a central FOREVER account. If you are a FOREVER customer with this type of access to other accounts, then this is where you would go to visit those albums which you had looked at before.
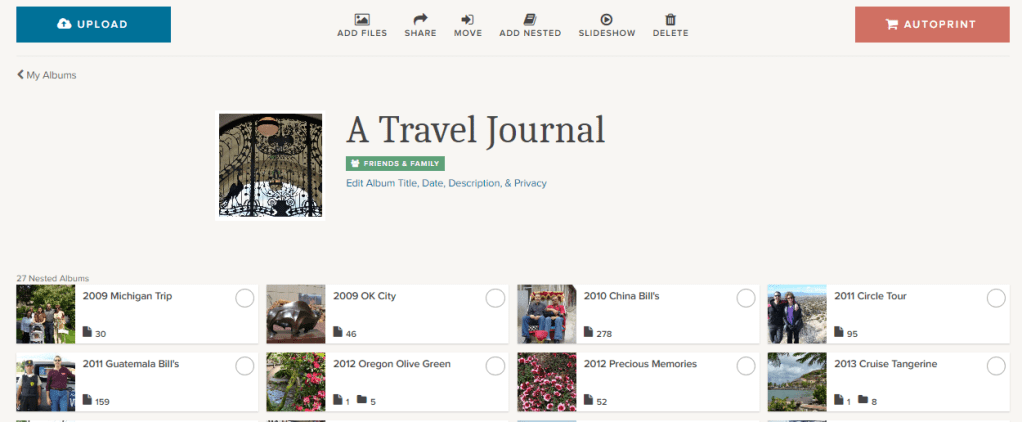
Individual AlbumOptions
If you have already added files to an album, then it will select an image for the preview. It can be changed to whatever you want. If the album is new and there are no photos in the album, then the preview will be a blue box, but as soon as you add photos, one will be automatically selected. The green box at the bottom of the box tells you the level of privacy chosen for that album, how many images are in that album and how many albums are nested below it.
Each individual album on your Album page has a small blue box in the corner. If you click on that, a drop down box gives you several choices of things you can do with that album.
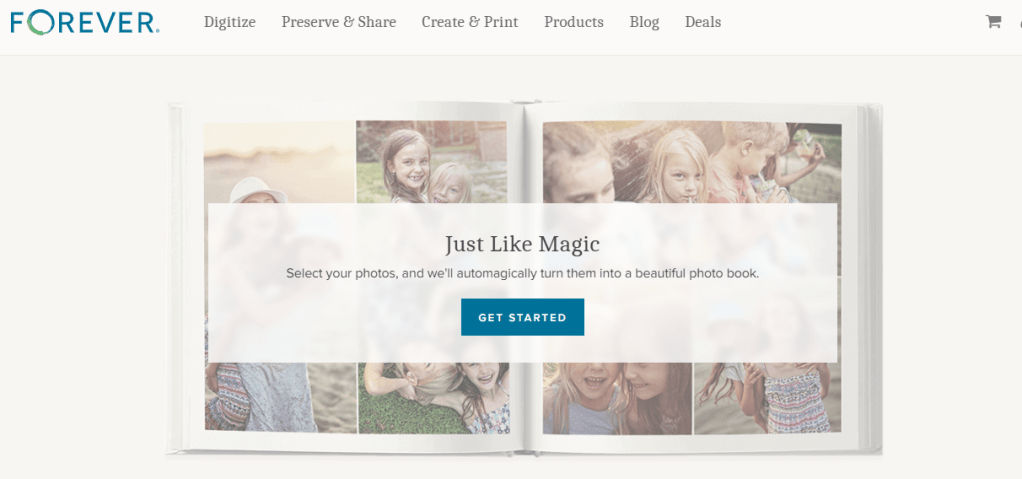
The first is “AutoPrint.” A few weeks ago I published a post about AutoPrint, which creates easy, quick projects almost like magic. If you select AutoPrint here, FOREVER will start building a project with the items in this album.
“Upload” allows you to upload images from your device directly to this albums.
“Add files” will take you to the Library so you can add images already on FOREVER to this particular album. It does not duplicate the photo, filling up your storage. All your photos live in the Library and are merely displayed in the various albums you create.
“Move” takes a photo out of an album and moves it to another one. As with Add Files, the images live in the Library. You’re just asking FOREVER to let you view this image in a a specific place.
“Delete” deletes the image. FOREVER will remind you the image is being moved to the delete bin and will be deleted in 60 days.
More Individual Album Options
If instead of clicking on the arrow as we did above, you click on the preview, you are given a peek at all the nested albums in the album and given many options, some you had on the outside of the album, but others as well.
You’ll find Upload, AutoPrint, Add Files, Move and Delete, which do the same thing as I described above, but you’ll find other options as well.
Click the “Share” button and this dialog button comes up. You can use it to share the entire album with someone with a share link. If you’d like for the person you share it with to be a collaborator, this is where you designate them.
The “Add Nested” button will add a new nested album to the album you are in. You will need to name it, but the Privacy Setting will automatically be the same as the album you are working in. You can add the other information as desired, but as I always say, the more info the better.
The “Slideshow” button will create a slideshow of all the images in the album, but will bein the slideshow, but it does not include the images in the nested albums within that album.
If you want to change the cover photo, click it and change it, but the image has to be in this album, not one of the nested album. You can also edit anything about the album with the “Edit ” button below the green box identifying the Privacy Setting.
If you click the circle on the left side of any of the nested items, you can then use any of the buttons I described above to perform that action in the nested items you’ve chosen. If you click anywhere else on the nested album, you will enter that nested album.
The only thing I have in my Top Level Albums are nested albums and the one image which is used as the cover photo. However, if you have multiple images in your album, you have more choices. Above this view are all the buttons I have previously described.
Notice on the right side, above the photos , it says “Order By.” When you click it, it allows you to choose the order based on the Date Taken or the Date Uploaded and you can select “Oldest First” or “Newest First.” That’s all the same as it is in the Library, but in your albums, you can also custom order the files according to your own preferences.
If you click on “Edit Custom Order,” you get a page like this that theoretically allows you to select the photos you want to move, then drag and drop them where you want. I say theoretically, because I’ve never been able to do that. I just click on a picture and try to drag it. I eventually get it to work, but I hope you have more luck. I am probably not holding my tongue right!
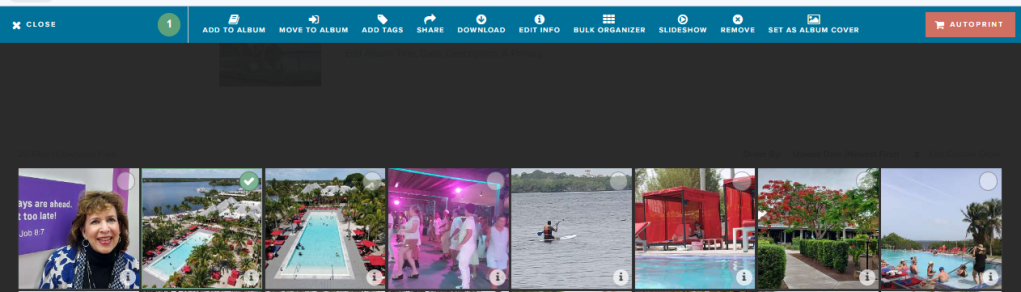
Whenever you are inside an album, you can chose favorites, by clicking the heart on the right side of a photo. If you use the circles on the left side, you are taken to a screen which will allow you to choose multiple images for a variety of operations shown below.
When you are in this screen you have access to many of the operations we have covered both a few weeks ago in the Library post and in this one, as well as some we haven’t seen before:
Add to Album will allow you to go get images from other albums you’d like to include in this album.
Move to Album takes the selected images out of this album and puts them in another.
Add Tags allows you to put shared tags on multiple images which you have selected.
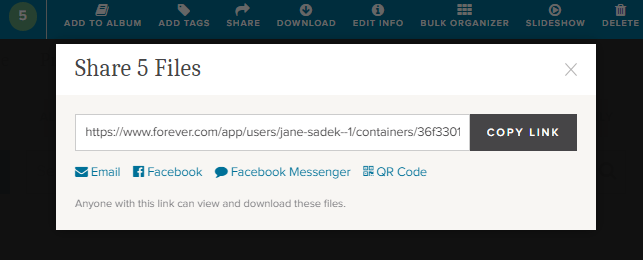
Share is your tool for sharing a selection of photos with someone via a link.
Download is for adding photos from the album to your device.
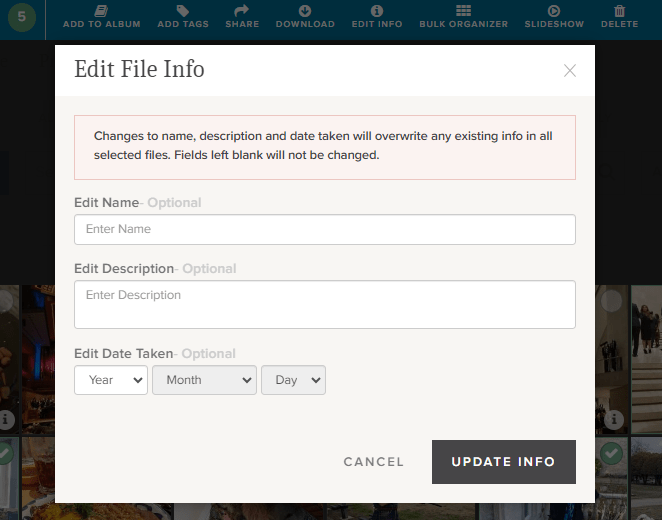
Edit Info is a great place to change the name, description and/or date for selected image.
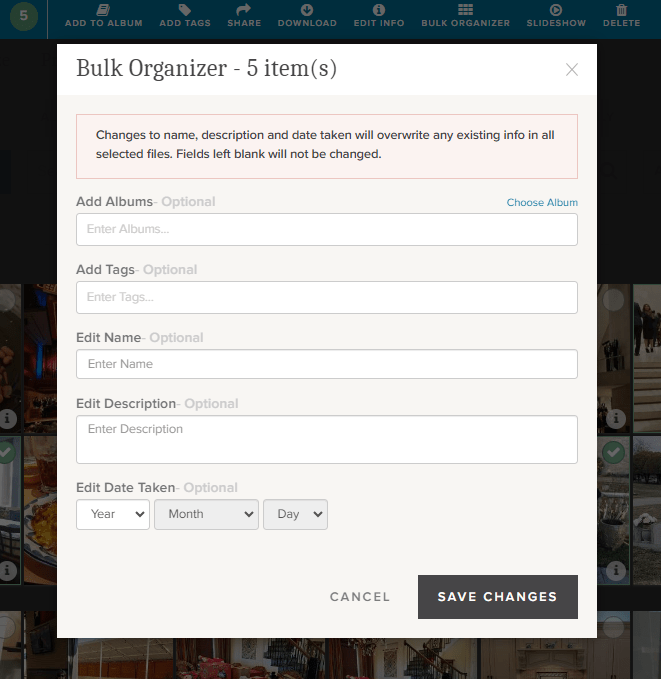
The Bulk Organizer is marvelous for quick curating of a number of photos at once. It will give you access to add the photos to another album, add tags, edit the names of a series of images, give a series of photos a description or change the dates of the photos. It is important to remember that what you do in bulk organizing overwrites whatever else you had input about the images, however, if you leave a section blank, it makes no changes. So, you could, for example, add tags and change dates, but leave everything else intact.
Slideshow lets you select images to include in a slideshow.
One of the more important buttons is Remove and this is the only place you’re going to find it. If you do not want to delete an image and it is already residing in other albums, then this button just takes it out of this nested album
Finally, Set as Album Cover allows you to choose an image to use as the cover of the album.
A Few Closing Thoughts
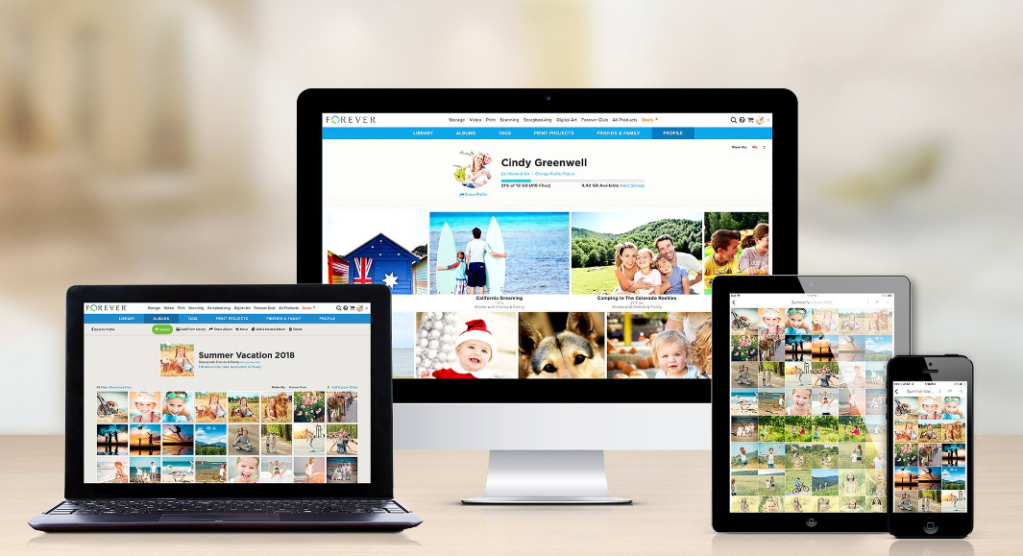
Though I have described the items in this post and the previous post on the Library from the standpoint of someone using FOREVER on a computer or laptop, most of these features are available on the app, just not in the exact format shown here. That means you can curate your albums on the go – waiting in the line to pick up your kids, sitting in a doctors waiting room, stuck in line at the grocery store or hanging at the pool.
Whether you are in the Library or in an Album, if you double click on an individual image you will be taken to a page on which you can provide info for that image. There is a lot of options there, so I will be covering those tools in a later post.
Finally, always remember I am here and happy to discuss your projects and challenges with you. If we need to ZOOM about something or sit down at your computer together (for local clients), let’s do it. Having access to your own Ambassador is part of what makes FOREVER so unique.
I’m here for you and so is the wonderful customer care staff at FOREVER. There is a comprehensive Help Center you can reach by scrolling to the bottom of any of the pages on the FOREVER site. Or you can just call or email. FOREVER’s Blog is a wealth of knowledge. Videos sprinkled throughout your Library, Albums and Tags will walk you though many processes. Or, like I said, I’m here, so just call me at 972-971-5263.
There is one question I ask a lot and this is it! It applies to many steps in the Memory Keeping process, but in our digital world, wondering what formats can be saved on FOREVER is a pretty important one.
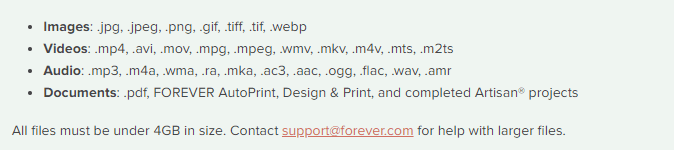
If you are a general consumer with photos, video and audio on your devices and computer, then FOREVER is going to save pretty much anything you want it to. Here’s a list of all the things FOREVER will save.
As you can see, this is a pretty comprehensive list. In fact, I don’t even know what some of those formats do. However, there are things FOREVER can’t save (yet), so let’s talk about those.
Raw Files
Many pro and hobbyist photographers take photos in Raw. This is a a generalized category which creates huge files for the purpose of file manipulation. When we were in the real estate photography business, our photographers would take their shots in raw on the HDR setting. This meant the files were huge and that basically they were in parts. Our guys would take multiple shots in a variety of exposures for each image, which would then be processed to create one data rich file for editing. The purpose was to manipulate light, so that we could take a picture of a room with the curtains open and get everything in the room and everything outside with perfect lighting. Various photographers use a variety of other methods to do the same thing, but this is the method we used and a lot of other photographers do, too.
The difficulty with this is that different cameras take different types of raw photos. Our Canon camera took .cr2 and the DGI drone took .dng. Your Nikon takes something else and other cameras will take another format. And this is why FOREVER has not yet embraced RAW in it’s suite of supported files, yet.
While FOREVER will not save all these raw files, most of the time the raw state is just a temporary destination for files which will become jpg’s. That’s what we did. General consumers don’t want to handle or store the huge, unedited files. We always converted our raw files to jpg’s as we processed the files for delivery. While FOREVER doesn’t store raw files, yet, it does realize that for some photographers, this capability is a high priority.
I have spoken with Dr. Nathan Bowers, the VP in charge of R&D and supporting these files is on the short list of development with FOREVER, but there are technical challenges associated with it. Nathan would have been happy to explain these details to me, but I wouldn’t have understood. If you would, then perhaps you should call him, but for the time being, suffice to say, FOREVER can’t store Raw files, but we’re working on it.
HEIC
Those who use and are familiar with Apple know they sort of like to be unique. If you have an Apple phone, then this is the format your photos are taken in. Not to worry! While FOREVER will not store your photos in HEIC, it will automatically convert them to .jpg as you upload them. For 99% of the population, that’s fine. They actually don’t care what extension is attached to their files, they just want to save them. There are some proponents of HEIC who want to keep their files in that format and unfortunately, at this time, FOREVER cannot save these files. I say “at this time,” because an ongoing desire at FOREVER is to never say no to any format. At this time it is not possible to store .heic on FOREVER, but that won’t be the answer forever.
Various Documents
Let me start this part of the conversation here. You can save PDF files on FOREVER. The document files on your computer are much like the raw files from a camera, because the type of file created depends on a variety of factors. That’s why PDF was created in the first place.
PDF stands for Portable Document Format. It was designed to make your files portable, whatever format they were created in. Converting most files to PDF is easy. You just change the extension to .pdf and viola, you have a PDF which can be stored on FOREVER.
So, will FOREVER store your documents? Absolutely! Just save them as jpg’s and upload.
APPS
When one of my friends bought FOREVER storage, the first thing they wanted to do was save everything on their Quickbooks. Well, for one thing, Quickbooks is already saved and backed up. Perhaps not to the extent of FOREVER, but certainly safer than the photos on your phone or the VHS tapes sitting on a shelf.
After a little discussion, I discovered that what she really needed was not the whole app, but the reconciliation she created each month. Easy peasy! The reconciliation was a PDF doc. Now she saves those to FOREVER and is perfectly happy.
The point is that while you cannot save a whole app, probably what you want to save is some document which is already in a format FOREVER can save.
Specialized Formats
The items I have covered so far in this post are the most common questions I hear, however the longer I do this, the more formats I discover. Did you know quilters have a specific format for saving their quilt patterns and genealogist have their own format? The list goes on.
If you have a specialty format that you’d like to save on FOREVER, please let them know. The development team prioritizes projects based on need and demand. I know quilters and genealogists have their own formats, because I’ve been on ZOOM calls where Dr. Bowers has mentioned these formats as items on his development list.
In the meantime, many of these formats can be converted to something like jpg or pdf, which can be saved. Or you can take a picture of the file and save the picture. It may not be the complete digital file, but it’s better than nothing, until it can be saved on FOREVER.
Summing Up
While FOREVER cannot save every type of file in the world, the list of things they can save is very comprehensive and most files can be saved with a simple conversion to PDF. FOREVER was designed for the specific purpose of memory keeping and it does that very well for the vast majority of formats in which people have captured their memories. If you have something in particular you need to save that isn’t on the list above, let’s talk. You might be closer than you realize to keeping your memories on FOREVER.
MEMORY KEEPING 101: A LITTLE INCENTIVE TO GET STARTED
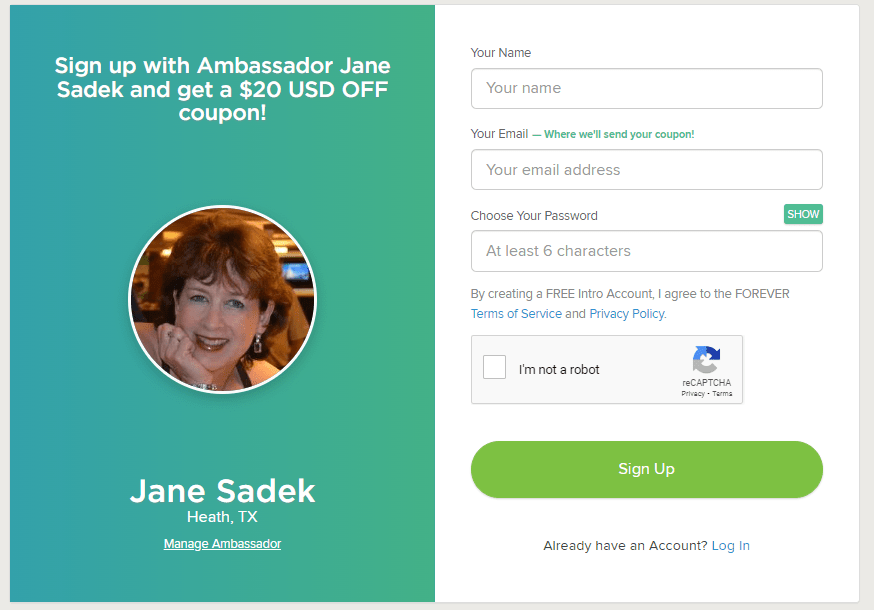
The $20 Welcome Coupon from FOREVER
I want you to discover FOREVER! I know I rave about it all the time, but I’m not sure you know how easy it is to get started. I probably also fail to tell you FOREVER has $20 waiting for you to sweeten the pot. Here’s how it works!
It Starts With My Link
FOREVER has assigned me a unique and specific link. They want you to sign up with an Ambassador you know. Someone who you feel comfortable with. They do not want to be an anonymous website like so many of web-based companies out there which assign you a number and talk to you through bots. They have a wonderful Customer Service staff and a great help page, but they want you to have a real live Ambassador of your very own.
That link takes you to FOREVER. According to the device you use, you may immediately be asked to provide your email and create a password. It’s OK, it’s free. If it just takes you to the Home Page, click on Log In in the upper right hand corner and then under the green Log In button, there’s a link “Need an Account? Sign Up Free”. Click that and you will go here.
Fill it in and hit the Sign Up button. That’s it! Welcome to the wonderful world of FOREVER, but don’t stop there, because you need to claim your $20.
FOREVER Will Send You an Email
When your sign up is through, go to your email. If you don’t see an email from FOREVER then check all those spam folders. Confirm your email address and then FOREVER will send you your Welcome Coupon.
Twenty dollars is waiting for you. When you open the Welcome Coupon email I suggest you either print it out and/or save it someplace where you can find it again.
Near the bottom of that email is a code. That’s your $20. You’re going to want that when you make your first order. Many clients are ready to buy when they join. They cut and paste their code into their order and they are done. But I also have clients who aren’t ready to buy from the get go. That’s why I want you to print it out or save it somewhere you’ll be able to find it later.
In Fact, FOREVER Will Send You a Lot of Emails
So, one of the reasons FOREVER wants you to verify your email address is because like everyone else, they want to send you all their stuff – and that’s why you have an Ambassador. FOREVER stuff is great if you are about to start a bunch of projects, because the emails will keep you informed of all the great promotions which are going on. If you’re just sticking your toe in the water and aren’t interested in the stuff, when you get your first promo email, go to the bottom and click either “update your preferences” or “unsubscribe from this list.” Then you can tell them thanks, but no thanks – but wait until after you get your $20 coupon!!! I don’t want you to miss that.
Use That Coupon!!
First of all, you have 60 days to use that coupon. On Day 61, it will no longer be valid. So please find a way to use it within 60 days of signing up. The coupon will work with most things on FOREVER, with a few exceptions – gift cards, events, FOREVER Club memberships etc., but for merchandise, it’s all good.
Stack your deals!! Many, many, many companies are quick to send you a coupon, but then trying to use it is almost impossible, because you can’t use it with any other offers. That’s not so with FOREVER, except in very, very rare cases, which will be clearly marked. You can stack your $20 welcome coupon with all the deals on the Deals page, as well as with The FOREVER Club discount, which I would be happy to explain to you.
Get the best price! At the first of every month, FOREVER informs its Ambassadors about all the deals for the month. When you know what you want to buy, just give me a shout before you hit the buy button. I can let you know if you can get a better price by waiting a day or a week.
And that’s it! Twenty dollars towards your Memory Keeping project. You can also get $20 for referrals, but we’ll talk about that and The FOREVER Club another day!
If you are one of my FOREVER clients, then just log into the FOREVER website or get on the app. Both avenues will allow you to do AutoPrint projects.
If you haven’t become a customer yet, it’s free and easy to sign up. You’ll also get a $20 Welcome coupon just for confirming your email address, so don’t forget that part. You do not need to have storage to create these AutoPrint projects. From the main page, hover over “Create & Print” and select “Autobooks from the left side.
For current customers, on FOREVER’s website >go to the Library > select your photos, >select Print in the upper right hand corner. Then follow your nose. I selected 4 photos, chose Coaster Set and in milliseconds I had a set of four gorgeous coasters. All I needed to do was hit the “Add to Cart” button. It’s that easy!
Breaking It Down a Little More
If that’s moving a little too fast for you, let’s take it a little slower. With AutoPrint, you have a wide variety of quick gifts to create:
AutoBooks
Sizes 8X8 -12X12
Softbound & Hardbound
Standard & Layflat
Photo Gifts
Coaster Sets
Tabletop Panels
Notebooks
Magnets
Drinkware
Water Bottles
Photo Mugs
Photo Prints
Glossy & Lustre
Sizes 4X6 – 11X14
Your first job is to select the images you want to use. While these selections can be chosen on the fly from your FOREVER Library or in a folder on your device, if you have storage, it’s easy to make an online album and collect the photos you want there. Start with the photo you want for the front and then add the rest in the order you want them to show up. A little preparation makes the actual ordering go even faster.
When you are on the website, hover over Create & Print and select “AUTOPRINT” from the drop down menu. Then select one of the four categories above. For this exercise, we’re going to make a standard 8X8 softbound AutoBook.
I selected AutoBooks and on the next page, I chose Standard. The screen moved up so I could choose an 8X8 Softbound. And here’s the Get Started Page.
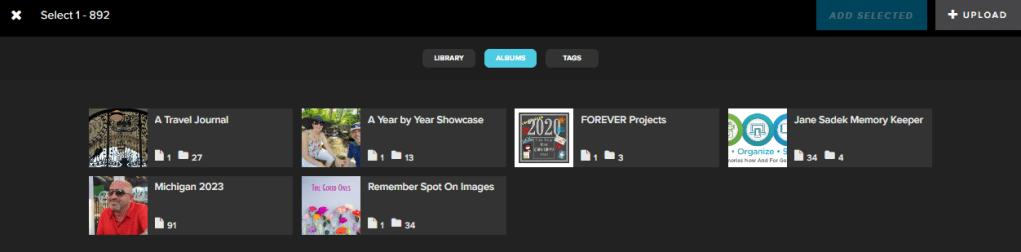
When I clicked “Get Started” it gave me this screen. From here I can go to my Library, my Albums, my Tags or as you can see there is an “UPLOAD” button in the upper right hand corner.
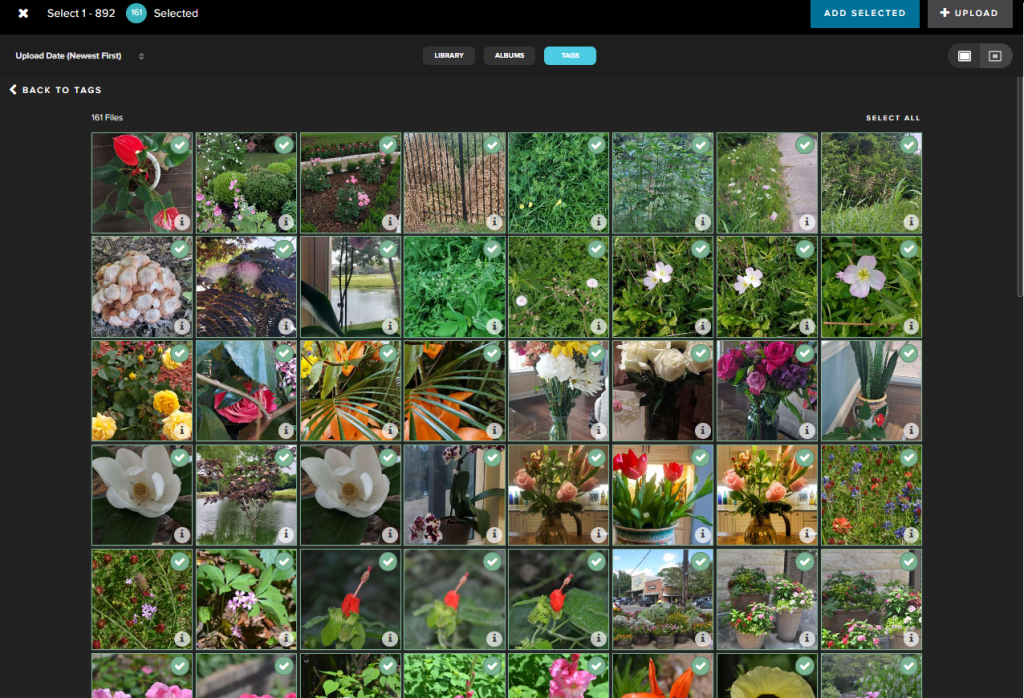
For this project, I chose tags and selected the “Floral” Folder. This folder has 161 photos in it, but I can have up to 892 images in my 99 page book. (Artisan 6 users can have up to 199 pages!!) I used the “Select All” button to get all 161 photos and then hit the “ADD SELECTED” Button.
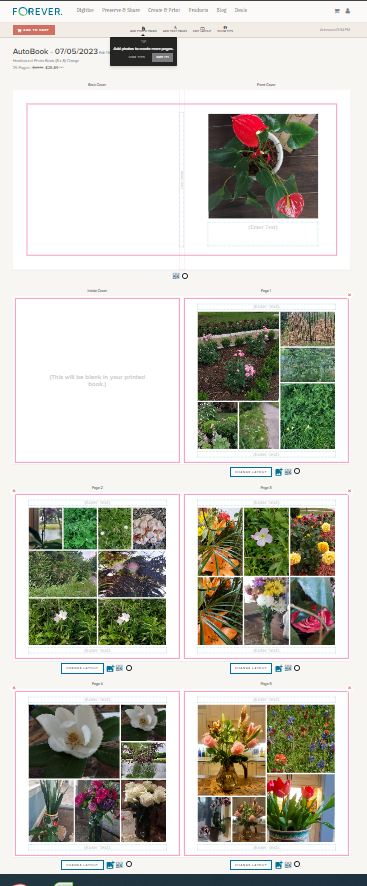
Before one second could pass, my book was created. I could literally hit the “Add to Cart” button and print out my album.
But wait, at this point, I have options. I can add “Photo Pages” or “Text Pages.” Or I can “Edit Pages.”
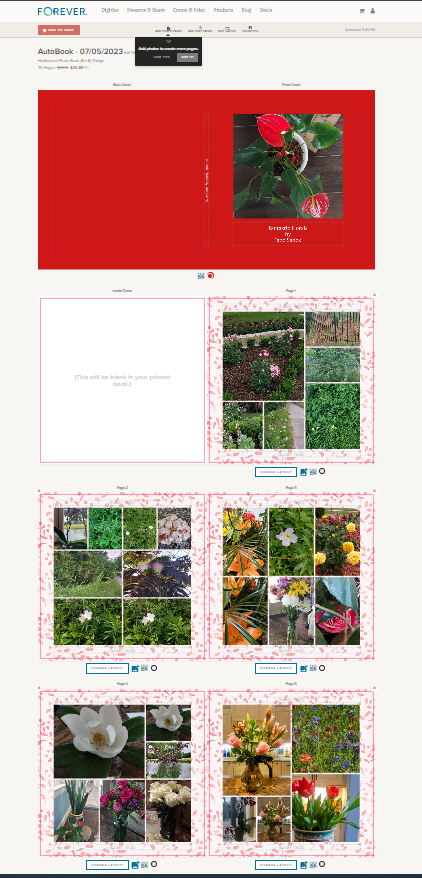
Let’s do some Editing! I added a title to the front of the book and the spine. I changed the layouts on some pages which had textboxes, because I just wanted photos. There are text boxes at the top and bottom of each page, but I left them blank, so they won’t print. I chose a pattern for all the pages and then a solid color for the cover.
It’s taken me longer to explain what I did than it did to do it.
Were I actually to print this photobook there is some cleaning up to do. I decided to do this particular tag folder very spontaneously and there are some duplicates. I might reorder the photos, too, but I wanted to show you just how easy it can be.
There are some changes in the works for AutoPrint, to streamline it further into Create & Print world, but FOREVER is devoted to offering the quick, easy and clean looking option, so while the navigation might change a little, the look and the ease of AutoPrint is not going anywhere.
I have to tell you, the retail price of the album was $27.15. My FOREVER Club Membership knocked it down 5% and a promo on that day knocked it down another 40%. I could have printed the photobook for $15.48 (plus tax and shipping). Who said Memory Keeping is expensive? And if you’ve been using another online vendor, because you thought they were cheaper, maybe this will give you pause.
In later posts, I’ll cover Design & Print and the Artisan 6 program, but next week we’re going to talk about how to $20 on your first order.
OK, so FOREVER is a Digital Media resource that offers everything from Media Digitization to Video Streaming – but if you hang around me much, then you already know that.
The FOREVER Library is the place where all the stuff you’ve uploaded to FOREVER hangs out. It’s not the only place. You also have albums, as well as tags for sorting and finding your photos, but the library is where everything is all at the same time. You can upload directly to the library or to your albums. It doesn’t matter.
What Can It Do?
Your library can do a lot of cool things for you, so I decided to take a few minutes to introduce you to it’s features. Obviously, the great big blue “upload” button is the one you’d use for adding photos from your computer to your storage. If you want to add photos from your phone, there’s a free app for that. If your media is hard copy, we need to talk about digitization. See last week.
Next to it is a search bar. The effectiveness of your search bar is directly related to the thoroughness of your curating. The more information you have about your photos in FOREVER, the more accurately you can search. A sampling of the search terms you could use would be dates, titles and tags, but whatever you’ve got, FOREVER will try to deliver something.
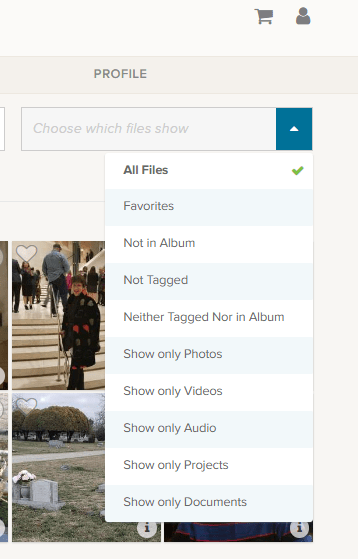
At the end of the upload and search area is a box that says “All Files”, but if you click the blue area you get these choices.
Obviously, All Files is all files. Favorites are photos you have marked with a heart. You can see an example of the heart on the left corner of the photo by the blue and white selection box.
The next are three very helpful choices as you begin to curate your images: “Not in Album,” “Not Tagged” and “Neither Tagged Nor in Album.” As you get your photos organized, labeled, tagged and such, the number of photos these choices will bring up will grow smaller.
I’m proud to say all but a handful of my photos are in Albums and all of those not in albums were taken in the last few days. I have my photos automatically added from my phone, by the app, when I take them. Then I delete them or add them to albums daily or weekly, according to the day and the week.
I’m working on the “Not Tagged”. Tagging is a great tool for searching. Some day I will have all the people and places tagged in every photos, so I can search by name or location to find any photo I want. So far, I have them all tagged as either Travel, At Home, Out & About, etc., but I have a long way to go. FOREVER recommends spending 15 minutes a day on this task and it’s a great idea.
Then there are a series of “Show Only” choices. With them you can see only photos, video or audio. You can also isolate documents in the collection. Projects are cool, because FOREVER keeps a copy of all the projects they do for you – the photobooks, photo gifts, greeting cards and such. These projects do not take up your storage space, but are always available to you.
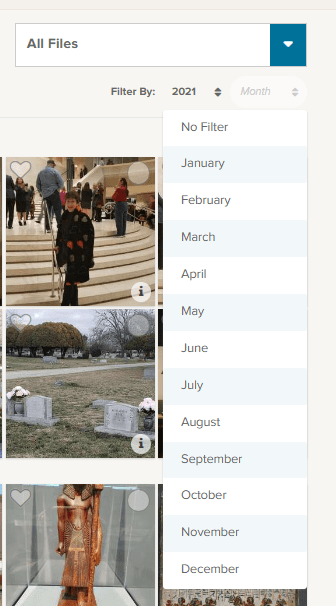
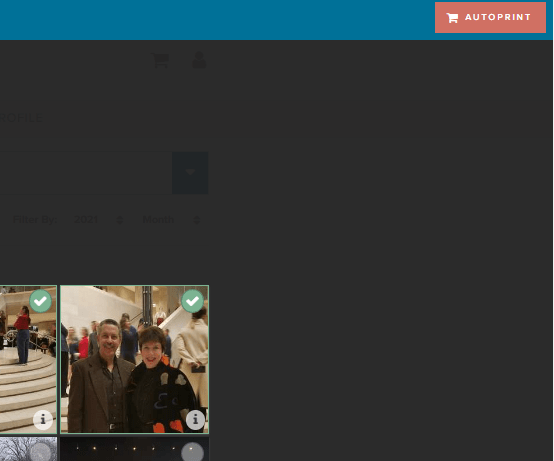
Under that selection box associated with “All Files” is a section where you can filter by both year and month. So, if you know you’re looking for the pictures of your husband’s 50th birthday, just select the year and the date of that celebration. In this image I chose 2021 for the year and have brought down the month selections.
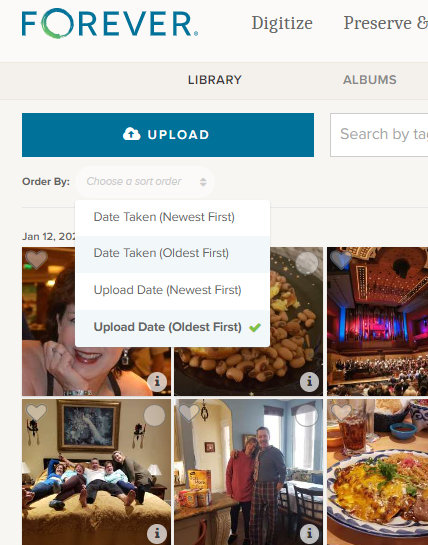
Moving to the other side, under the “upload” button, you find the “Order By” selections. I tend to leave it on Date Taken (Oldest First) because I think in chronological order, but you can reverse it and as for (Newest First) if you are looking for something taken recently.
Sometimes you aren’t as concerned with when it was taken as you are when it was uploaded and the next choices cover that.
Other Things to do in the Library
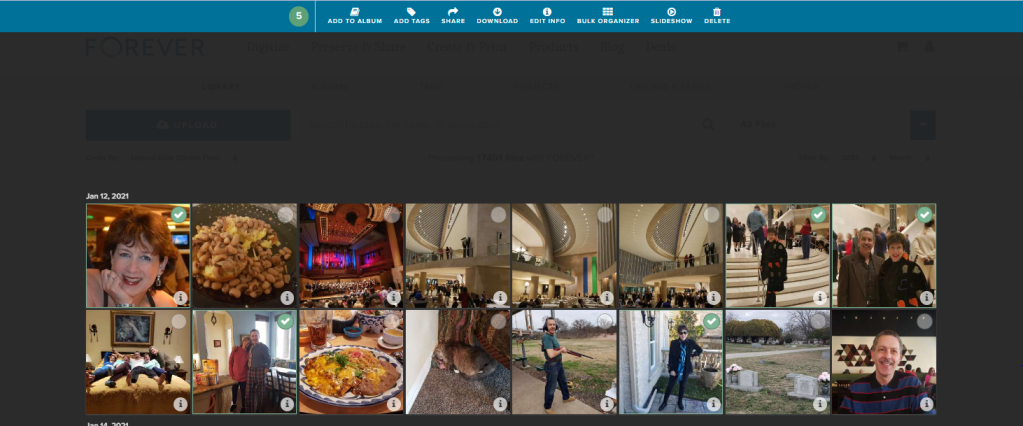
Returning to the picture at the top, you’ll notice that each individual photo has a heart and a circle at the top. The heart, as I mentioned above, allows you to mark your favorites and you can always choose to have the Library show those to you. The circle allows you to select images for curating. Let me show you.
On the main Library page, I checked a picture and the screen above opened up, giving me new choices. I went ahead and selected all the pictures I was in, on the first date available, but I could have chosen every picture of me in the library, all the pictures on that date or even just one photo at a time to work on.
If I chose “Add to Album,” I would get this screen. It allows me to either set up a new album, add the selected photos to a top level album or with the “View Nested” arrow, I could actually add them to albums which are “nested” under the main album.
If I chose “Add Tags,” then I could add tags common to all five of those photos. Obviously, since I chose pictures of myself, I could tag them “Jane Sadek,” but you are allowed an unlimited number of tags, so people are only the beginning. And you can do more than one tag at a time, so if I had three ways of identifying all these photos, I would add all three tags. They could either be tags I had already created or I could create them using this tool.
Also from the Library you can share photos with other people. You can select as many photos as you like and then either share the link which is created or create an email or a post or message for Facebook. You can even create a QR code. How cool is that!
There’s a “Download” button next and when you click it, you’ll be linked immediately to your browser. Select where you want the photos to be saved and save. You’ll have a copy of these photos on your computer.
The “Delete” button (at the far end) will bring up a screen which asks if you want to delete photos. If you do, it will put them in your FOREVER delete bin for 60 Days.
Now this is a good one. The “Edit Info” button allows you to change the basic information on a file. You know how photos come from your camera with vague names like IMG 36 or a string of numbers. Well, you can change it to a more specific title like Jane in Dallas 2021 or whatever name would be more useful.
You can also provide a description of the photo here. You could explain who Jane was, what she was doing in Dallas, what your relationship to her is – whatever you want. In fact, while the description boxes you run into with many programs have a 25 word or 100 character limit, this description can go on for as long as you’d like it to.
You can also edit or add a date. Sometimes our devices try hard to fill in blanks and provide a Date Taken which has no basis in reality.
If you’re loading a whole bunch of photos to your storage, the Bulk Organizer could be your best friend. You could do the whole curating job in one fell swoop. You just have to remember that whatever you put here will override anything else you might have in the metadata.
You can make changes to all of these sections or just choose those you want.
One more choice. Perhaps you’d like to select a group of photos for a slideshow. Well, there’s a “Slideshow” button. It will autoplay whatever you’ve selected and you can even put it on “Loop” so you can play it continuously.
Well, there is one more thing you can do from this screen. You see that brick colored square that says “AUTOPRINT”? Well, this could be step one for your next print project. Just select all the images you want to include in a digital photobook, photogift or perhaps you’d just like to print some copies to share.
The AUTOPRINT buttons connects you directly with the various potential projects in Autoprint. That’s where FOREVER does most of the work, like magic. You select the images and the project. FOREVER will do the rest. You’ll be given the opportunity to do some minor editing, if you chose, then all you have to do is pay for it and select your delivery method and address. You can have custom projects ready in seconds!
Wrapping It All Up in the Library
Most of these same features are available in the FOREVER app, as well as on the website, as I have shown them here. You just find them in different places. Personally, I enjoy working on files in the Library when I’m at my desktop or using my laptop, but I’ve heard of people who curate their entire collection of media on their phone, sitting by the pool, drinking a cool adult beverage.
It’s up to you. If, while you are in the Library on your computer, you need a reminder about any particular images, just hover over the “i” in the bottom right of any images. A small black and white screen will pop up to show you what FOREVER knows.
And that’s all there is to it. I plan to write similar posts about Albums, Tagging and the App in the coming months, but next week we’re going to AutoPrint. Start thinking about a project you’d like to have completed quickly – like magic.
MEMORY KEEPING 101: JUST IN CASE YOU’RE WONDERING WHAT WE CAN DIGITIZE
We Digitize More and Better
That gray box company that you may or may not be familiar with, which has all the advertisements on the radio and social media about digitization, says this about what video formats they digitize:“We work with many video formats including VHS tapes, VHS-C, Mini-DV, Hi8, Digital 8, MicroMV, Betamax, and PAL.”
You know what? That sounds good until you compare it to what FOREVER says, “We can digitize any and all consumer videotapes including VHS, beta, Hi8, Mini DV, DVDs, and 3/4″ U-matic.” Did you see those three little words? ANY and ALL?
And our more is more. Search around the other guys website and you’ll never see statements like these, which are just everyday jobs for FOREVER:
We can digitize standard 12” x 12” scrapbook album pages.
We can digitize photos larger than 8” x 10”, historical documents, newspaper clippings, photo albums, books, oversized scans, medium and large format slides, and medium and large format negatives.
We can transfer content from picture CDs and data discs, flash drives, external hard drives, 3.5″ floppy discs, flash memory cards, smartphones, and digital cameras with internal memory cards.
We can digitize exceptionally large orders, or orders requiring an advanced level of organization and processing.
We Offer More and Better Delivery Options
When your digitization is over, the other guys do not offer permanent storage solutions for the images you’ve just paid so much money to digitize. They want to sell you DVD/CD’s, Thumb Drives or Cloud Storage.
Well, if a DVD/CD or Thumb Drive is what you really want, FOREVER is happy to deliver, but it’s not what we recommend. Why? Because those are just Memory Disasters looking to happen. DVD/CD’s and Thumb Drives are devices – devices which can fail or become obsolete. The other guys are just setting you up for the next time you need to upgrade your technology.
Oh, the other guys will happily rent you a piece of the Cloud, but which Cloud? The one that will bill you monthly or annually for as long as you both exist. The one that can compress your images, transfer them to another company and mine for advertising. The Cloud which has forced you to sign terms and agreements which say if your photos are deleted you have no recourse. The one which has told you they will delete your photos as soon as your account is not active – as in you didn’t pay for your storage or merchanides that month? That’s not FOREVER storage.
Instead, FOREVER offers permanent storage you own rather than rent. You can pay for it with a one time payment or in 24 installments, but then it is yours and your family’s forever – seriously. You’ll never have a device which can be corrupted, fail or become obsolete. You can’t lose it or destroy it. Your online images will never be compressed or deleted. They’ll never be transferred to another company. They’ll never be mined for adverting. Your photos are guaranteed safe for your life plus 100 years, in part because they are triple backed up in diverse geographical locations and protected by a fund devoted to your storage. And the best part, instead of coming back to you when technology once again renders you obsolete, FOREVER will just upgrade you to whatever the new technology is. Doesn’t that sound a lot better?
And one other small item – we’ll send you back all your originals. You are welcome to throw them away if you like, because they are digitized and safe, but most of us would like to keep at least some of them around. But the other guys, when they’re through, so is your stuff. You never see it in the physical world again. Ouch!!
So, if you are thinking about digitizing your photos, then let’s talk 972-971-5263. I want you to have a more and better experience!
Last week, on Facebook and other social media channels, I made a big announcement. My husband and I sold our real estate photography business. This had been so, on paper, for about a month, but last week we drew open the curtain for everyone to see. Though I am working hard to offload all my Spot On Images duties on the new owner, we’re not quite there, yet – but I can see the light at the end of the tunnel is not the headlamp of an oncoming train.
Spot On Images was the brainchild of my husband. I was only along for the ride. I remember when Bill pitched the idea. I was not exactly enthusiastic and it hurt his feelings, but we’d been married for almost a quarter of a century by then and I knew the routine. He has great money-making ideas, but his visionary capabilities fail to embrace the drudgery and hysteria of supporting said enterprises. Though he realized it would take more than a camera and a website to make the dream a reality, he really had no clue what would be necessary.
There was a division of labor. He did the photography and managed the money. I did everything else. Everything else was not the fun part. I’ll leave it at that. A couple of years ago I hit a brick wall. Like the rest of the world I was sick and tired of masks, Zoom meetings, vaccines and social distancing. The world was beginning to open back up and I wasn’t looking forward to going back to the grind. I introduced the idea of my memory keeping side gig and Jane Sadek – Memory Keeper was born.
A Juggling Act
Perhaps starting a new business when I already had plenty to do in the one we had might not have been the smartest thing I ever did. My new business had all the growing pains of any new venture and initially I actually had more success than I could handle. That was not good for my marriage, but it didn’t hurt Spot On Images one bit. We’d created a snowball and it was barreling down the mountainside.
At that point, other people might have quit, but Memory Keeping is not just business venture for me. It is my passion. So, while I severely dialed back my Memory Keeping activities, I did just enough to keep the embers warm.
Then we arrived at a crossroad. Spot On Images had outgrown the two-man job we’d created for ourselves. Oh, we’d already hired editors and more photographers, but the company was on a trajectory that needed a five year growth plan, more personnel and more headaches. This wasn’t what we’d signed up for, so we decided to sell.
On the Other Side
As this post is being published this Thursday morning, I will be loading the trunk of our car with luggage. We’re going on a trip. Just a five day jaunt to the Detroit area for a family event, but a world of difference from a couple of years ago. That time I stayed up over night before we left, to nurse the editors through our rush jobs, so I could deliver photos by 4:30 AM and catch our flight. During that trip I missed the opportunity to enjoy one of the top picks on my itinerary, because we ran into a hiccup on an important job.
As far as I know, there’s never been a Memory Keeping emergency, which is one of the best things about my new career. A hallmark of any business related to real estate is drama. In photography we were once removed from the insanity I endured as an agent, but because we cared about our clientele, their drama our emergencies. If someone has a Memory Keeping emergency, then I’m not their Memory Keeper. I am out of the emergency business.
While I will need to support the new SOI owner during the weeks to come, my primary focus will be Memory Keeping. I have so many exciting plans. I’m in the middle of a huge sorting job for one client and will be picking up my next scrapbooking project when I get home. I’m going to offload the SOI archive out of my FOREVER account and fill it up with my personal photos and then set up my demo account to share with potential clients. There’s so much training available with FOREVER that I could spend the next year on that, but I will have to restrain myself or I won’t have time for working on my projects or getting the word out that there’s hope for your Memory Messes.
In the future, look for online training, office hours for customer support, a Memory Keeping coaching program and that’s just the beginning of the list of things I want to offer to those of you who want to tackle your Memory Mess. I am so excited, but to make this work, I’m going to need your support. Whenever you hear a friend or family member bemoan their own Memory Messes, I hope you’ll send them to me. I can fix that!!
MEMORY KEEPING 101: FOREVER FOUNDER SHARES HIS WHY
What’s FOREVER?
FOREVER is not yet one of those companies everybody knows about, yet I think a day will come when it will be the go-to place for all things digital-memory-keeping. Until then it’s one of my missions in life to be sure people don’t lose their memories from lack of knowing about FOREVER.
You can’t be around me very long without finding out I care about your photos and have all the tools you need to preserve them for generations to come. That’s especially true if you read this blog.
Why FOREVER?
The founder of FOREVER recently took the time to share the reasons why he has devoted the rest of his life to this company. In this short (4:40 minutes) video he tells what led him to discover the need for the company and why he feels it is such an important tool for anyone and everyone to use.
No one could be more eloquent on this subject, so today, instead of writing a few more hundreds of words, I’m sharing this video. Please take the time to watch it. I think you’ll agree with me, the time has come for FOREVER.
Glen Meakem, Founder & CEO of FOREVER shares his why
So, what do you think? Are you ready to make FOREVER your memories’ home?
MEMORY KEEPING 101: THINK OF IT AS A RED CARPET FOR YOUR PHOTOS
What Do You Have & Where Do You Want It?
When I ask this question, most people have only the vaguest idea of where all their memories are and they really don’t have a really good idea of where they want them to be, but together we come up with a plan to find everything and get it someplace safe for generations to come.
When the bulk of their memories are on traditional media, like photographs, slides, video and such, the answer is easy. It has to be digitized! While there are a number of ways to go about getting from a pile under the bed to organized folders on FOREVER, it’s a pretty straight forward process.
If those memories are on their phone instead, well that’s easy, too. The FOREVER app can upload everything on your phone to your FOREVER storage while you sleep. Then if you like, it will continue to do so into perpetuity, so you never have to worry about losing your photos, even if you lose your phone, it gets stolen or if somebody runs over it.
When those photos are on a computer or hard drive, getting all of that organized on FOREVER was doable, but could be a long drawn out procedure. In truth, the bigger your mess was, the easier it was to transfer. If everything was carefully organized, there was not really any way to transfer all of that organization to FOREVER without doing it all over again. BUT NO MORE!
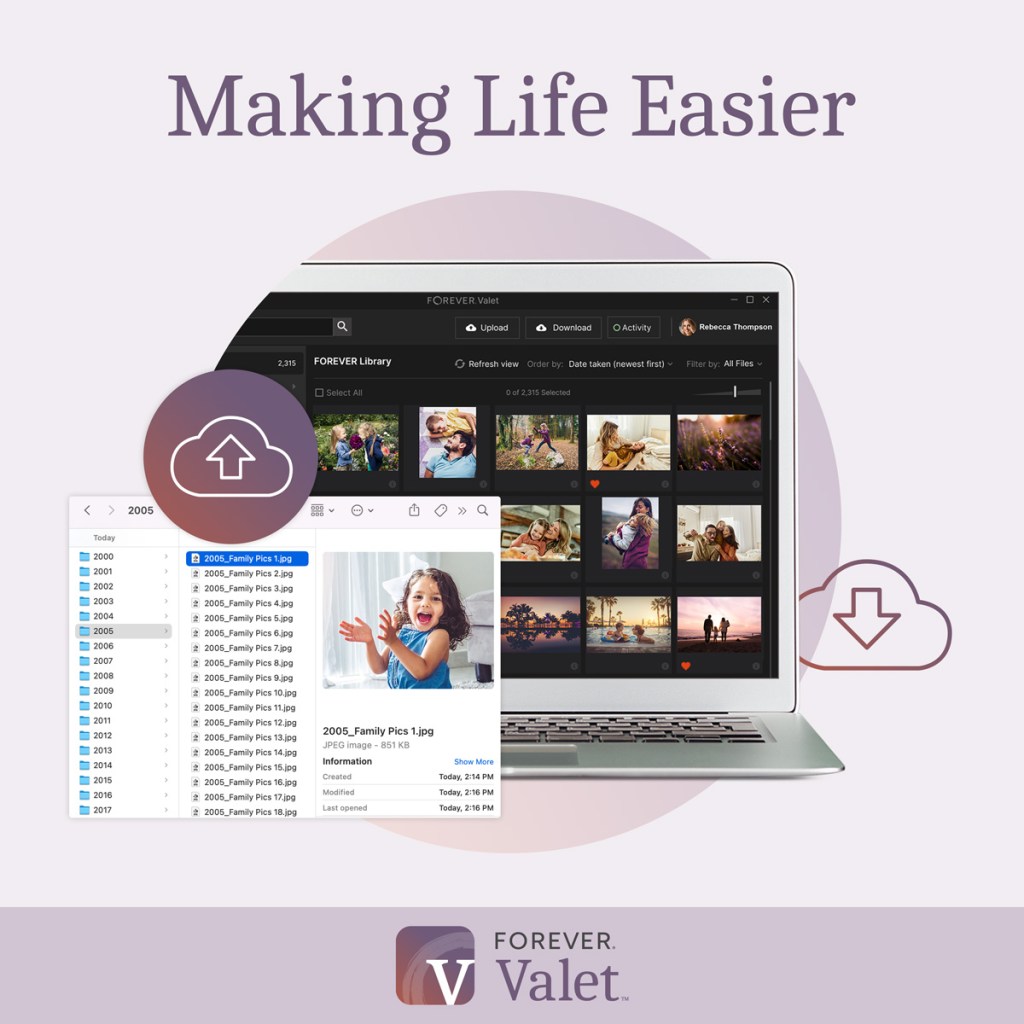
Valet Is Here!
Valet is a magic carpet ride for your photos. Thousands and thousands of photos can be moved from your hard drive, computer or laptop, with a few clicks of a button. If your photos are nothing but a great big mess, that’s great news! With Valet, they can arrive in FOREVER in nice neat folders, sorted by year and date, with all the duplicates pulled out. However, if your photos and videos are already in nice neat little folders on your device, then FOREVER will just move the whole thing – organization and all into FOREVER – BAM! It’s done!!
What’s even better is that you get to decide what kind of Valet customer you want to be:
Free One Month Trial – If all you want to do is a one time upload from your computer to FOREVER, then this is the route for you. There is no limit to the number of photos you can upload to FOREVER (or download from FOREVER, for that matter), you just have to do it all in 30 days. You can use it to get photos off your computer, off your husband’s computer, off your parent’s computer or wherever. The Valet Trial is associated with your FOREVER account, not a particular device.
Yearly Subscription – If a month is not enough, then how about a year. For only $59.99 you can do all the things mentioned above, but instead of 30 days, you have a 365 of them. That’s pennies a day.
Professional Subscription – If for any reason you have access to more than one FOREVER account, then perhaps you’ll need the professional version. It was designed for professional organizers, but there are other applications as well – such as if you are part of a family, team or other group using FOREVER for a project. The professional subscription is $299.99.
Here’s the good news. You can use your Club Dollars to buy it and it qualifies for the Club Discount. How can you resist?
If Valet sounds like something you’d be interested in, let’s get together and talk about how it can help you. It’s a very exciting product!!