DESTINATIONS, DFW Metroplex, Photo Organization, Photo Organization Coach, Photography, Scrapbooking

The Weekend Report

TRAVEL HERE – BORING!

Turning the Corner to 2023

Believe me when I say, last weekend 2022 was winding down. It wound down to nothing.

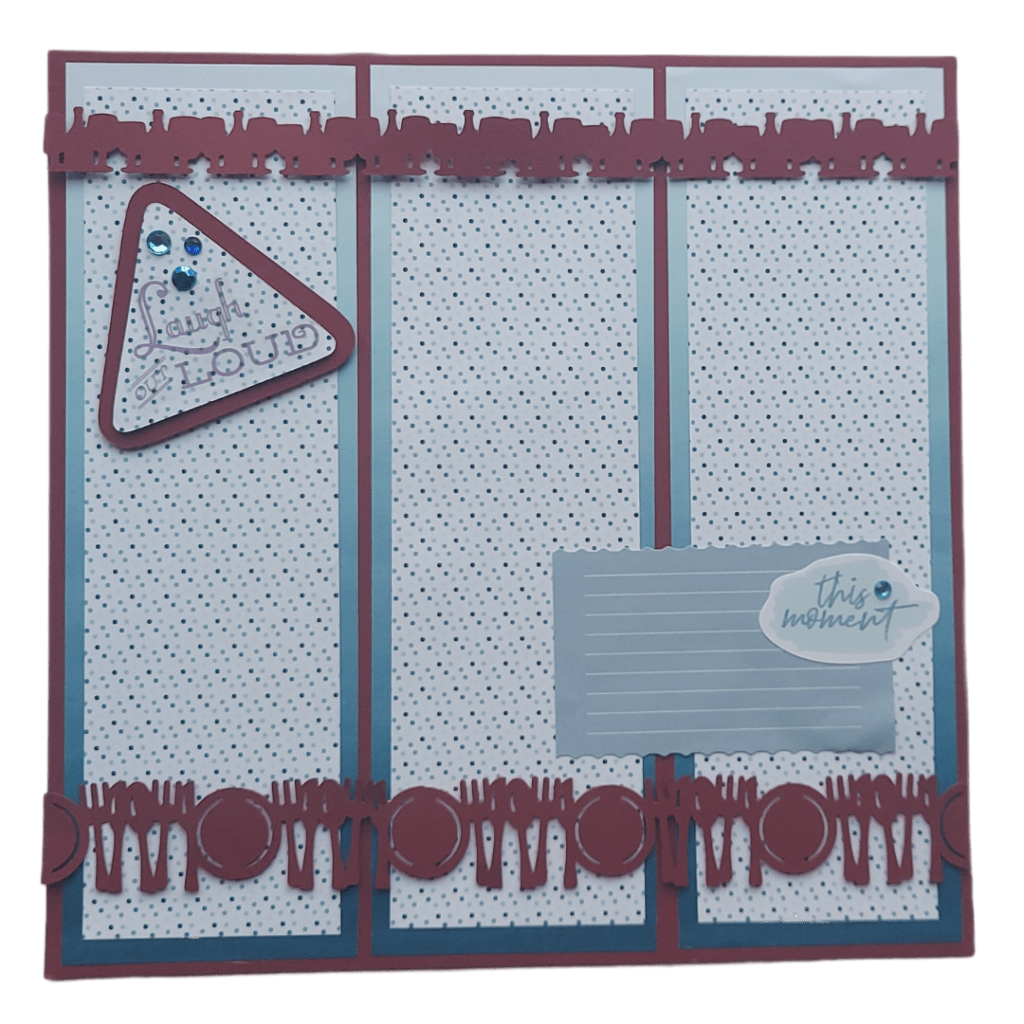
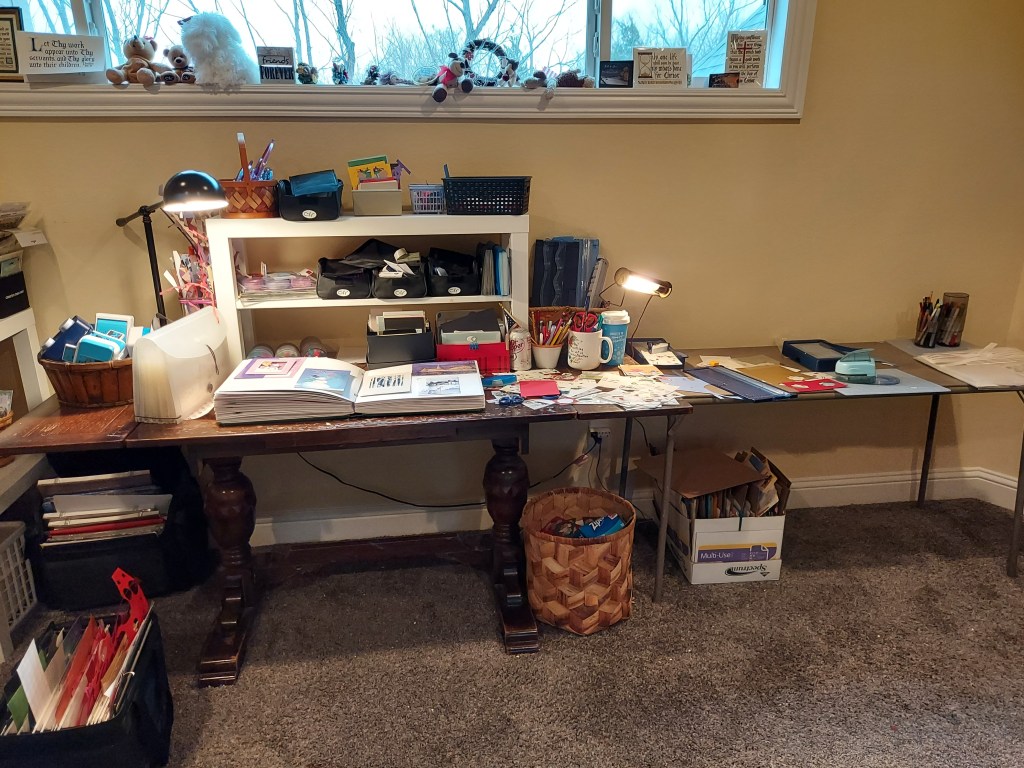
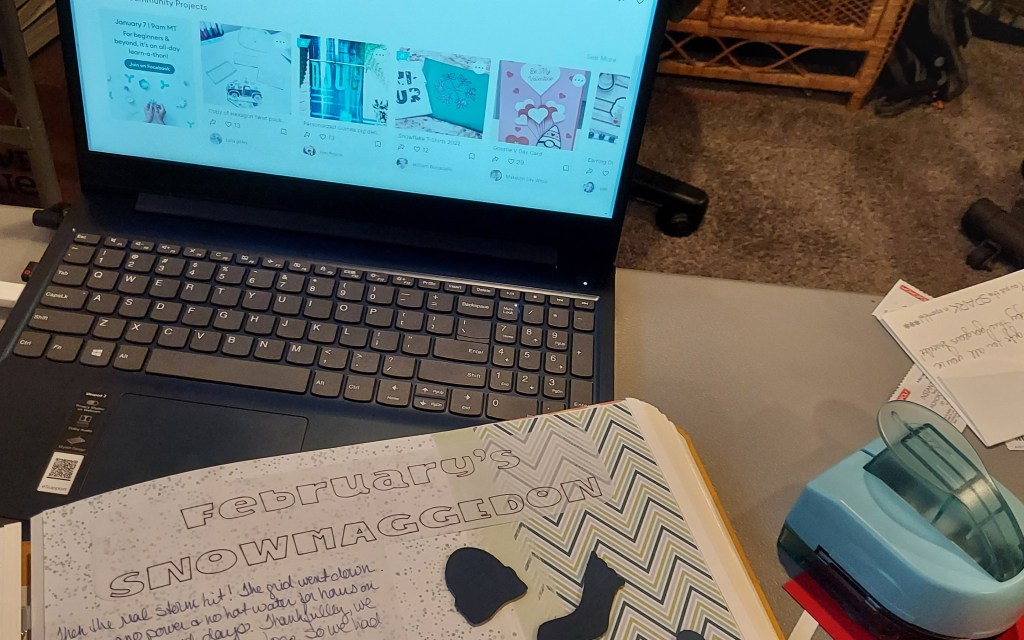
Friday morning I spent some time with my new Cricut – my favorite Christmas present. So far it’s been all learning curve and no real spectacular moments of craftiness. I’ve spent more time learning what it can’t do than I have making stuff. Leave it to me to find the edges of digital technology.

Friday afternoon, we had lunch at Community BBQ. For my bestie and I, it was a return trip, but we were joined this time by her brother and Mr. Bill. I shared a rack of ribs with hubby and avoided the loser mac & cheese, but I saw them take some to another table. It looked much improved.

This visit was not quite as good as our first. The wine was still free, because they haven’t gotten their liquor license, yet, but this time my ribs were fatty. The okra was delicious and I enjoyed a baked potato. Deb’s brother had the brisket and seemed to love it. She, like me, repeated the ribs and was happy. Mr. Bill was disappointed by the ribs, because they were beef ribs. He has very particular taste and if it’s not baby backs, he’d rather not.

Saturday morning I played Marian the Librarian. I keep the library at our small church going and we’d had a huge influx of books. I’d brought them home to prep them for the shelves and made a morning of it. That afternoon I went around the house and the yard taking down the Christmas decorations. The manger scene in the front was another of my favorite Christmas presents, but I got it early so we could display it for this season. Now, it’s in the garage. We have to figure out how to store it!

For New Year’s Eve, Bill and I ate our leftover ribs for dinner and sat on the sofa catching up on episodes of The Voice. That’s pretty lame for a couple who got engaged on Christmas Eve, almost three decades before, but we choose to stay home out of the madness. We drank good champagne at midnight and crawled into bed.

The New Year Arrives with a Bump

If it’s Sunday morning, then I’m probably at church. New Year’s Day was no exception. I shelved all the newly donated books, attended Sunday School and then during the worship service I got the bad news I knew was coming. Our pastor is leaving us here in the Bible Belt, where there’s an evangelical church on almost every corner, to lead a small church in one of the most neglected mission fields in the world – New England. Seriously!

My pastor and his wife had made it known about six months ago that they felt a calling away from us. At that time they didn’t know where they’d go, just that they knew they were done here. I was so sad. Finding my church had been a multi-year task. Worship formats everywhere have taken a turn away from what I love and I’d made the rounds without much luck. This church was an uneasy fit for me in some ways, but they have a traditional worship service and the teaching during the Sunday morning service was stellar, some of the best I’ve ever had.

Now I have to decide what to do with myself on Sunday mornings. No giant of theology is coming to fill the soon-to-be empty shoes of this marvelous teacher. In fact, the elders are going to take turns with the sermon. Natural attrition has taken away some of my favorite people in the congregation and while there are those I love, for the most part I am I fish out of water. I was there each Sunday for the teaching that won’t be there anymore.

Ten years ago, that wouldn’t be so much of a problem, I’d go find another evangelical church with a great teacher and a traditional worship service. Just finding a traditional worship service is one problem, but finding one with a live preacher is even more challenging. I’m just not ready for church on the big screen. So, God and I are chatting about what is next.

Strolling Down Memory Lane

As I mentioned earlier, Bill proposed to me at the stroke on midnight on NYE 1993/4. It had been a complete surprise to me – a good one, but he’d kept his secret well. So, January 1, 1994 I spent the day trying to wrap my mind around the fact that I was engaged to be married to the handsomest man in the whole wide world.

That afternoon we took a walk along the dock at Chandler’s Landing. Together we carved out our path for the coming months. Bill was ready to get married immediately, like could we do it in a few weeks as far as he was concerned. That was plausible if we had a small, quiet ceremony, which I thought was fine, except that he wanted a big wedding with all the trimmings. That meant I’d need a few months to pull it all together.

Chandler’s Landing was very members/residents only back in those days. There was no Yacht Club Restaurant open to the public. We were interlopers, but on that very quiet day, no one seemed to mind. On Sunday we still had to cheat a little, telling them we were going to the restaurant, when all we wanted was the restaurant parking lot, but we literally strolled down memory lane as we walked along the docks.

Chandler’s Landing has changed. It was fairly shabby in 1994, a mere shadow of what it had been designed to be. Today, things are different than they were back then. The HOA has taken over the facilities and hired a very good management company to bring it all back to its former glory – and they are doing a good job of it. The restaurant is still hit and miss, but everywhere you look things are looking better than they were twenty-nine years ago.

Our Ham and Black-Eyed Peas

We skipped The Yacht Club on this visit. We had to eat our ham and black-eyed peas, which I had for us at home. Nothing fancy. I picked up a ham steak at Kroger to go with the can of black-eyed peas I already had on the shelf. I like cornbread with that meal, so I also picked up a package of cornbread mix. It didn’t take long to put on the table, but we enjoyed it. Afterwards, we watched a little TV.

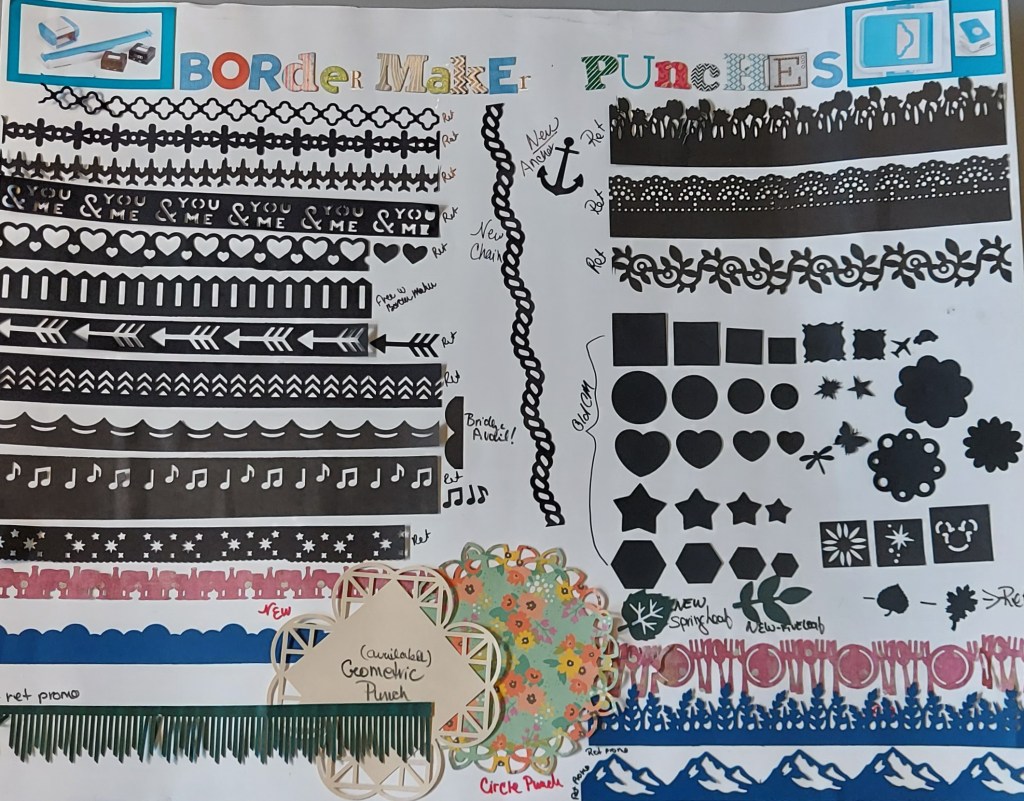
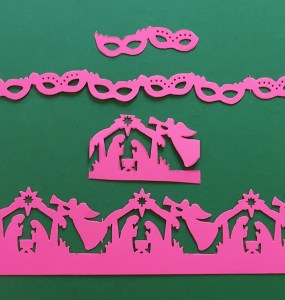
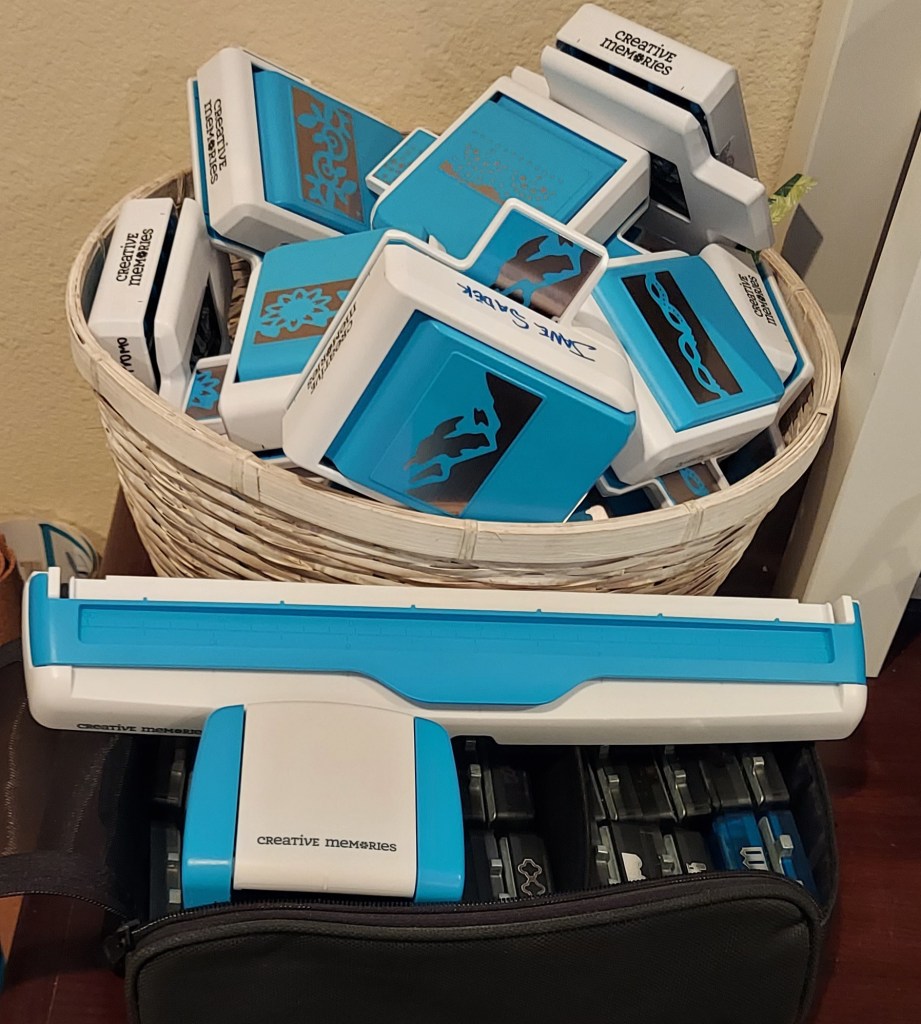
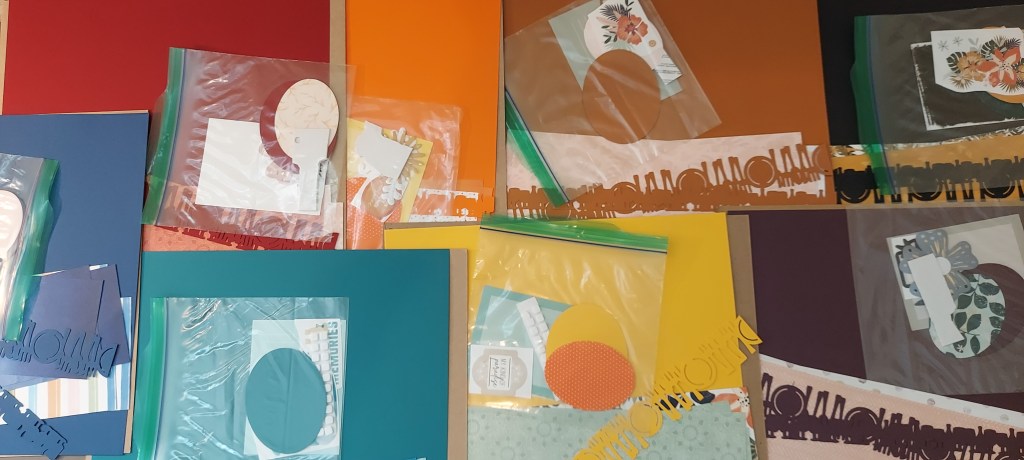
The New Year is off to a good, if quiet start. I am wrapping my life around the resolutions I have made for a “Better Me in 2023.” As befits a new year, my Travel Talk posts will be taking a new turn to New York City. Then Memory Keeping 101 will focus on punches to go along with all that paper I love. I hope you’ll join me for the fun.

DFW Metroplex, Photo Organization, Photo Organization Coach, Photography, Scrapbooking

Getting Punchy

MEMORY KEEPING 101 – TOOL TIME FOR SCRAPBOOKERS

A Sampling of Punches and Border Makers

A couple of years ago I made the poster above to demonstrate the many shapes you could make with Creative Memories Punches and Border Maker. Some of these are no longer available, but they’ve also come up with all kinds of new ones. I always want every single one they introduce, but you soon learn to get a little picky.

Punches, Border Punches, Frame Punches and More

Punches are individual tools you can use to make anything from various sized circles to a variety of borders. However, each punch only makes one thing, be it a single shape or a certain pattern. The great thing is you can make them out of any color or pattern of paper you want to. Punches start at about $25 and go up to about $30, according to what the punch will do.

If it makes a single shape the punch is less expensive. The more you can do with with a punch, the more it costs. Some punches can stand alone on the page or make a border, like the Masquerade and Nativity border punches above. In the top picture of the poster, towards the bottom is a beige square. That’s one of the Frame Punches which will either make a border or the square you see above. Then there are the circle punches. They only do one thing and it requires a flipping the paper over in the middle of the process, but CM has only made a few circle punches and they are the most expensive. None are available at this time.

That’s the basic operation of punches, but if you are patient and you are given to a little experimentation there are all sorts of things you can do. Some croppers have figured out how to get some of the regular punches to do the same sort of thing as the specialized punches. Others use two punches and make a border with two shapes on it. These are the crafty people. You can spend all day on CMTV, the Creative Memories channel or on You Tube watching all the crazy things people figure out to do, but you’re not going to find me there. I just use the tools for what they were intended and never run out of ways to use them.

Border Maker System

Like the Custom Cutting System, the Border Maker System is a collection of tools you use together. With the Custom Cutting System, you get a mat and some blades to go along with several shapes and sizes of patterns. For the Border Maker, you get a two piece tool that works together to hold and cut your paper. Then there are a plethora of cartridges you can buy to use with the two piece tool.

While the punches have a tendency to sing, dance and serve hors d’oeuvres, all the border system does is make straight borders. The basic system is $35.50 and then the cartridges are $19.50 each. After your initial investment in the two piece tool, which does come with one cartridge, it is less expensive to buy the various shapes. I used to say that generally the Border Punches made wider strips than the Border Maker, but nowadays it’s hard to tell, just by looking, what tool made any given border.

Making Your Tools Work for Their Supper

Nothing in scrapbooking is in a vacuum. I’ve been traying to make it simple during these intro posts, but the more you learn about scrapbooking, the more there is to learn. There is more than one kind of page. There are several choices of adhesives and which one you use depends on what you’re sticking down and what you are sticking it to and what you want it to look like after it is stuck down.

When it comes to punches and borders, the same thing applies. There is absolutely nothing wrong with punching out one border and placing it directly on the page or the wallpaper. However, once you start working with them, you can get as crazy as you want to. Some punches only cut an edge off the paper, while others cut on both sides making a chain. You can use the edge punches on a wide strip of paper to make fancy strip cut on both sides. You can start stacking your strips and come up with completely new looks. Some crafty people make borders that are several layers thick, incorporating everything from letters to stickers and embellishments. About all I ever put together is 2-3 layers, but that’s me. You do you!

Obviously, you could go bankrupt buying punches and border maker cartridges, but they only represent a portion of the tools available to scrapbookers. There’s a corner punch which will create two different corners for your photos or mats. The 12 inch Trimmer has seven fancy blades to interchange with the straight blade. There’s a decorative trimmer to make your own wavy strips, a circle cutting for making infinite circle sizes and a zero centering ruler which is very helpful. I love the multi-purpose tool for scraping up things I’ve stuck down by accident and there’s a pointed end which I use for all kinds of tasks my fingers are too fat for. You need pens for journaling and there are two different scissors, both of which I use. And templates – did I mention them. Well, they can be used for several design jobs. Then there are sorting and storing tools which are really nice.

All this and you haven’t yet bought a single sticker or embellishment. Oh my! Have you begun to understand just how expensive it can be to get addicted to this hobby?

Next week, since you now have an idea what it costs to take up scrapbooking, let’s talk about the value of letting me do it for you.

DFW Metroplex, Photo Organization, Photo Organization Coach, Photography, Scrapbooking

The Fun Stuff(?)

MEMORY KEEPING 101 – EMBELLISHING YOUR PAGE

A Brief History of Embellishments

Back in the day there were two kinds of embellishments – die cuts and stickers. You bought them. You used them and it was all over. Then you had to go shopping for more die cuts and stickers. Fast forward until today. You can still get die cuts and stickers. The assortment available with Creative Memories and other suppliers is limitless. However, you buy them, you stick them down and they are gone. You want more – you buy more.

The Custom Cutting System was one of the first forays into tools you could use to make limitless embellishments in the colors of your choice. The only shapes available at first were circles, but it was revolutionary. If you’d wanted to have a circle before the CCS, you used a plastic template to draw the one size available and then used scissors to cut it out freehand. I was dismal at it, so I was happy for an option that made perfect circles at least more often than I could cutting them out freehand. I still had my challenges, but it was better.

As they started adding other geometric shapes to the Custom Cutting System, they also started making punches available. At first, like the CCS all you could get were geometric shapes, but it was still cool. Then they added others, like leaves, cars, planes and such – but in the beginning, they were really small and didn’t make much of a statement on the page.

They also came out with a variety of trimmers so you could make strips. There was one for straight cuts and then a second one with a couple of wave patterns. They even came up with various blades for the straight trimmer so you could get different kinds of edges. I have to tell you though, those rotary blades were dangerous because you could slice your finger easier than you could get a good cut in your paper, but the new trimmers all have enclosed blades.

A Border Warning

I guess this is the place where I have to talk about borders and titles. Borders and titles are a thing among a lot of scrapbookers and CM pushes them like the local drug dealer offers gateway drugs. In fact, CM recently put out a book with 110 borders ideas and believe me, they are beautiful.

The borders start with a strip 2-3 inches wide and then you layer letters and embellishments on them. The borders can be put at the top and or on the bottom or added to the sides or even run through the middle. Some consultants advisors (the old CM used to call us consultants, but we’re now advisors) spend their days creating borders to sell at workshops and crops.

Some people start every page/2 page spread with a pair of borders at the top and bottom or at either side. No wonder scrapbookers want to buy them pre-made! Now, don’t get me wrong. I love borders, but I don’t use them on every page. I sure as heck don’t make them several layers deep with one of the layers being a jigsaw puzzle of small paper pieces.

You can make beautiful, simple and quick pages with just photos, memorabilia and a few items of decoration. I do it all the time. People pay me to do it and they love every single page – even the ones without borders.

You can also use lots of borders if you want to. I just don’t want you to think you have to spend your days cutting out minute pieces of paper to layer on a pair of 2-3 inch borders for every page. You need to decide whether you are a memory keeper or a crafter.

To me, this kind of scrapbooking is expensive in time, materials and space on your page. It also puts the emphasis on the decoration of the page, rather than the photos and memorabilia. Borders push scrapbooking from the realm of memory keeping into the world of crafting. I am not a crafter. I don’t have the skill, the patience or the time (not to mention the money) to be a crafter. My focus is preserving memories.

I say this now, because we are treading on dangerous waters here. Scrapbooking is fun and it can certainly be a craft, but when you start down the road of embellishments, you start adding to the time and money you devote to the job of memory keeping. Time and money are the top two inhibitors which keep people from memory keeping.

As I flipped through the new idea book, one of the first ideas I saw had a woven paper lattice on a three inch strip decorated with layers of punches and floral embellishments you can buy ready-made from CM, to go with those you’d need to make. It was gorgeous. I wanted to make one right away.

Then I thought about the time, materials and tools I would be using and the fact that I didn’t even have a page to put it on right this minute. I actually have all the tools used in that particular border, but as a flipped through other pages, I was dismayed by the number of punches, bordermakers and blades I don’t have.

I am happy to support your scrapbooking, however you go about it, but if you’re like most people, elaborate pages are the wide and straight road into frustration, incomplete pages and guilt from overspending. I’m warning you not go there without your eyes wide open. A few punches will enhance your pages. A lot of punches could be a dream or a nightmare.

Okay, enough of a warning, come back next week and all introduce you to the other dangerous habit I have to go along with my paper addiction – punches and Border Makers.

DFW Metroplex, Photo Organization, Photo Organization Coach, Photography, Restaurants & Bars, Scrapbooking, Shopping

The Weekend Report

Travel Here – Holiday Parties and BBQ in Downtown Rockwall

Holiday Parties

White Elephant

Scooching back to Thursday, I had a spate of holiday events at the end of last week. Thursday morning was a monthly networking event in Turtle Creek . In truth, I didn’t see a single gift which made me want to take it home. The gift I took got oohs and aahhs and was one of the few which was traded, but I confess it was a re-gift. Well, not exactly a re-gift. I’d won the tea mug in a raffle and the last thing I need is another dish or mug. My cupboards runneth over. So, I saved it for something like the gift exchange.

I opened the Binge-Watching Survival Kit – a White Elephant gift on steroids. Inside are 2 face-cleansing towelettes, 2 dental floss, breath drops, emergency socks, 2 stain removing towelettes, 2 coasters, snack clip, 2 hand cleaning towelettes, 2 folding sporks, facial tissues and a sofa yoga guide. Do you actually think there is any difference at all in the face cleansing and hand cleaning towelettes? The only thing I found remotely entertaining was the “Decision Coin.” One side says “One More,” while the other says, “Go to Bed.”

For now, I’m holding on to it, in case another gift exchange rears it’s ugly head. I’ll probably break it up after the holidays, putting some of it in the car for emergencies and the clip chip in the kitchen, but that spork is going into the trash. The metal box will be great for stickers!

HOA Party

That evening our HOA held a Christmas party for the neighborhood. I knew they’d have the same old fajita buffet they usually do and the same old people, too. When we moved here, I’d hoped we’d have neighborly neighbors and at first it seemed we did. Then things went left. One thing led to another and let’s just say the no drama llama wouldn’t be comfortable on my street.

In spite of the drama we’ve been through, we do have the very best next door neighbors in the world, but I knew they were traveling, so I would have stayed home. Since Bill wanted to go, we went. We got our plates of food and the only people we did know had already filled up a table, so we sat down with strangers. I want you to know they were very nice, but their endeavors to get to know us were so intense we felt like we were suffering an interrogation. We shoveled down our fajitas and high-tailed it back home.

Wine Glass Exchange

One of our very favorite clients has an annual wine glass exchange during the holidays. I was invited for the first time previous to the pandemic and I was all out of kilter. I’d bought a beautiful bejeweled wine glass to exchange, but discovered raunchy was the name of the game. The glasses most frequently traded were those with the naughtiest sayings. Everyone, but me, had brought in food, even though the invitation said nothing about it. The invitation did say BYOB, but most of the bottles were hard liquor and they were sharing cocktails. I took home my bottle of prosecco and the only portion missing was what I drank.

The pandemic caused a two year hiatus, but this holiday it was back on. While raunchy is not my style, I did manage to find a glass with some sass. I took a plate of desserts and a bottle of champagne. It was good champagne, but even though I only had one glass, the champagne was gone within five minutes. The fudge on the dessert plate seemed be a hit. I felt much more in the groove.

When we gathered around the tree, I discovered I had been a trend-setter two years ago. This year be-dazzled glasses were the trend and my sassy glass went to the dead pool. The gift I opened was not a wine glass at all, but a water goblet. I had seen it earlier in the day, on clearance at Hobby Lobby. My gift exchange luck was holding at bad.

Saturday Afternoon Fun

Downtown Rockwall

I woke up Saturday and hit my scrapbooking table. I had lunch planned with my bestie after her dance lesson, but I’m working on a huge sorting project and all the holiday folderol had kept me away from it. By the time I met her downtown, I’d made some headway on the project.

When we moved to Heath back in 2015, Downtown Rockwall was pretty sad. There was some renovation going on, but there were more vacancies than businesses in the storefronts around the square. That’s all in the past now. As I stood on a corner waiting for bestie to show up, I was pleased by the hustle and bustle around me. There are no more vacancies. It makes parking a hassle, but it’s a good hassle to have.

Though we have several favorites in Downtown now, we opted for something new, Community BBQ and Grill. Their website says they won Best of 2020 from C&S Media, but since they are still in their soft opening, there’s something fishy there. The site also says they are “traditional, not typical,” and that I can vouch for. We had the ribs (if there are ribs, we always have ribs) and they were eat-with-a-fork good. That’s how much meat they had on them.

The fried okra was served piping hot and delicious. The rolls were good, too. I can’t vouch for the mac & cheese. Not sure what’s going on there. The mac was spiral pasta and the cheese was a runny sauce. However, Deb had the cole slaw and she said it was both fresh and delicious. Wine was free, because they don’t have a license yet. It was a nice Pinot Grigio.

Hunger sated, I had one more Christmas gift to buy, so we went down to Bella’s House on the Square. There are several stores I enjoy visiting on the Square, but I know Bella’s has Brighton and that’s what I wanted. I managed to only leave with the gift, but several other things would have loved to come home with me. Deb bought a Christmas ornament, but I don’t have anymore limbs on my tree and I think Bill would have a conniption if I came home with any holiday decor.

Scrapbook Delivery

I had one more to-do on my list, but it wasn’t downtown and I couldn’t take my bestie. The scrapbooking project I did for the pageant queen had been completed since the end of November, but we were having trouble getting our calendars to mesh. Finally, we had a time that worked for us both.

I love everything about my little cottage industry, from the moment I meet a potential client to the delivery of their project, as well as every photo, item of memorabilia and sticker in-between. This delivery was albums two and three for this particular client. I was eager for her to see them, so the waiting had been difficult.

The delivery of a traditional scrapbook is my favorite thing. Memory keeping is an important tradition and I’m glad it translates into our digital world, but for me, digitized photos or a printed photobooks just don’t have the emotional impact of a scrapbook. (Hubby disagrees, by the way. He’s all about video and photo books.) Most of my clients look through their album with tears in their eyes. Not all of them and my pageant queen is not a crier, but her absolute glee was apparent.

She also started hauling out my next jobs for her. She wants albums of her kids. The kicker is, someone somewhere along the way made albums of her kids for her, “but we like what you do,” she said. She also said, “Has Meagan called you yet? I’ve got another referral for you, too, and be ready, because everyone who sees what you do will want you to do the same thing for them.” From her mouth to the ear of God!

So, that was the weekend, Sunday was church, memory keeping and a walk around the neighborhood. Not terribly exciting perhaps, but a good time. Come back next week, for more Vegas, more memory keeping and another Weekend Report.

DFW Metroplex, Photo Organization, Photo Organization Coach, Photography, Scrapbooking

Building a Page

MEMORY KEEPING 101 – IT ALL STARTS WITH YOUR STUFF

Gather the Photos and Memorabilia

Before I ever get to building a page, I’ve already done a lot of sorting. When possible I try to do things in chronological order, but that’s me doing personal albums. Your albums may have a completely different organizational system and that’s just fine. After you do this a while, you start to get a feel for how much will fit into an album, but even I can get surprised about how much will fit on a page.

I try to do two page spreads whenever possible. I tie the side-by-side pages together with matching or coordinating papers, but I start with the photos and memorabilia. I gather what I have for a particular day, event or subject and I spread them across the two pages to begin visualizing what the page will look like. Do I have enough to cover two pages or am I trying to cram too much on there? Is there a good balance between photos and memorabilia? Does the memorabilia tell the story or will I need to add captions, titles and journaling? Do I need all the photos or are some repetitive?

Then I begin to trim the photos I am going to use and as I do I start to think about what I’ve got in the way of papers and embellishments which will fit the theme and complement the photos. I place the trimmed photos on the page in the configurations I think work best without actually adhering them to the page. This sometimes hints at the papers and embellishments which will work best.

The hunt begins. Sometimes I know exactly what I want. Sometimes I spend a significant amount of time searching for the right pieces. It is a bit of a balancing game. Usually there’s either a paper or an embellishment that comes to mind when I am placing the photos on the page. I get that and then I start looking for what will go with it, but there is no rule about what piece to start with, because other times I have bought a particular set of stickers for a certain occasion and they are my starting point.

Let’s say it is the wallpaper which comes to mind first. I will find it and scoot it under the trimmed photos. Perhaps the next thing is a journaling box that needs to fit into a particular space. Each step I take I put it in place without adhering it, because as long as it’s not attached to the page I can continue to play with it until I get it right. The bottom layer is the wallpaper. Next is the mat or mats. The photos go on top of the mats. Then you have to work in the journaling boxes, stickers and other embellishments. When it’s all in place, then you stick it down with the appropriate adhesives.

There are variations on each item based on your unique style. I’m a speed demon, so usually one mat is all I will use, but I have seen beautiful pages where the photos have 2-3 mats layered behind them. I’m likely to slap the sticker right on the decorative paper, but some people gather multiple stickers together to make a collage. Crafty people use something called Peekaboo Pockets to create layers of photos which must be flipped over to see all of the images and decoration or they create messages which slide out of a pocket with a tab. You can use all of these or none of these. It’s fun to try things out and see what you enjoy doing, as well as which results you like best.

Simple Pages – Completed Albums

What you have to remember as you decide how heavily you will decorate the page is this: The more complex the pages are, the longer it is going to take you to finish your album. This is why the more creative among us sometimes have a hard time finishing a page, much less an album.

The final touches on any page are the embellishments. Hear me when I say you can be a very successful and creative scrapbooker without ever using an embellishment, especially if you have budget and time constraints. If your primary concern is to have completed albums to share with your family and friends, then the fewer embellishments you have the better.

At the same time, for many of us, the embellishments are the icing on the cake. Yes, the mission will always be the main thing, but we want our Punches and Border Makers, too. We love hanging out at the craft store looking for the perfect stickers. Even the boxes which we journal in can be an embellishment.

Don’t come back next week if you’re not interested in decorating tools and supplies. I’ve already walked you through the basics. You’ll invested about $300 and whenever you start a new album you’ll spend about another $75. The embellishments are the budget breakers. They are also the reason I buy so much paper. The embellishments help set the tone and the theme of the page without anyone reading a word of your captions or journaling.

If you’re at all like me, you will barely be able to wait to learn about all the tools and supplies available for scrapbookers. I hope you’ll join me next week.

DFW Metroplex, Photo Organization, Photo Organization Coach, Photography, Scrapbooking

Confessions of a Paper Hoarder

MEMORY KEEPING 101 – ORGANIZING YOUR PAPER ONCE YOU HAVE IT

Being a Paper Addict Has It’s Challenges!

Costing about 79 cents to $1 per 12X12 page, your paper is a valuable asset in your scrapbooking supplies. For that reason you need to find a way to protect it once you have it. While Creative Memories has awesome storage tools, it’s not the only game in town. Buy what you want, where you want to for your supply organization or even incorporate things you already have around the house, but don’t just leave the paper sitting around unprotected. And perhaps you’ll be smarter than me and not become a paper addict, so you won’t even need all this advice.

To protect my paper, I use various CM organizers I have bought over the years, but I also use a variety of boxes, envelopes and such I’ve repurposed for my scrapbooking supplies. For this reason, my studio is pretty low rent in comparison to those of other scrapbookers. They have special shelving to hold the cardstock and it looks just like what you see in the craft stores. Then they have another kind of shelving built to hold themed papers in their original packaging. They line it all up alphabetically and chat with one another about it like they are talking about old friends, instead of packages of paper.

Do not be intimidated by these scrappers. Your scrapbooks do not come out looking better just because you have fancy storage systems. You also shouldn’t buy up more paper than you will need in a reasonable length of time, unless like me, you just like paper. You do need some kind of system, so you’ll know where your stuff is and it won’t get damaged, but that’s the only criteria. As I’ve said before, it helps you get your scrapbooking done if you can designate a space in your house as your scrapbooking corner, but even that is not a requirement. It just helps.

My System

So, I have 10X12 papers I bought in the nineties, 12X12 cardstock and printed papers I’ve bought since then, and a whole lot of everything else. Any newly opened CM paper I have sits in a CM organizer, divided into plain cardstock, shimmer cardstock and printed paper and then sorted by color. I know the CM organizers will protect the paper because they are made with the same photo safe requirements. The primary reason I segregate my CM paper is because I do, from time to time, sell something to someone. You don’t need to be so fussy.

I also have my new papers from other sources stored in CM organizers. Many vendors sell their pages in a themed book, but I take them out and sort the paper. A smaller organizer holds papers from a ginormous book which would destroy the top edge of the sheet. I keep them separated, because I know they will not fully cover a 12X12 page and they are also not strong enough to be wallpaper. These are organized primarily by color, because there are no real themes. The rest of the non-CM papers I keep in a larger CM organizer, organized by theme.

All these steps just make me organized, but the sheer volume of my stash is a little ridiculous. It’s the rest of it that makes me a hoarder, but it also makes me very practical. I keep my scraps – all of them. Sure, if you’ve merely cut a circle out of one corner of a page that cost $1.25 almost anybody would store that page until they found a way to use the rest of it, but if it’s bigger than an inch, then I’m probably going to save it, too.

The pictures above are a sampling of my organized scraps, which I file by shape, size and color. On the left are the strips. In the middle are my small odd-shaped scraps. At that point, I am not as worried about archival issues. I challenge myself to use these rather than cut into a new piece of paper. It’s sort of a game with me. Cut new paper and I lose points.

Then on the right, behind my sticker organizer is a black CM organizer where I keep those sheet-sized scraps. This is not so much to protect them archivally as it is to keep them from getting wrinkled.

Do It Your Way

I have told you how I store my paper, not because it’s the right way to do it, but to give you some of my ideas, which might help you develop your own system. You may never see a piece of paper smaller than 12X12. You may always buy CM paper or you might never buy it from them. You may only have a few packs at any given time or you could become a full blown paper addict, like me. You be you.

These are the basics of paper handling and this is where you can stop buying tools and supplies, if you’d like. It’s all you’ll ever need to make beautiful albums. However, it just scratches the surface of what’s available out there if the scrapbooking bug bites you as hard as it has me.

Next week I’ll chat with you about the steps I take to build a page, which will by necessity introduce you to some of those other tools and embellishments you don’t need, but which will beg you to buy them.

Architecture, Decorative Arts, DFW Metroplex, Photo Organization, Photo Organization Coach, Photography, Real Estate Photography, Road Trips, TRAVEL

The Weekend Report

TRAVEL HERE – TRAVEL THERE: WORK & PLAY OUR WAY

Busy Business Saturday

We woke up with a to do list. Shoot a home in McKinney, pick up photos for a memory keeping project and then go home and pack. Two out of three ain’t bad – am I right?

The shoot went well. It was an amazing house and we were doing everything standard real estate photography for the MLS, drone work and videography. It took a long time, but it went smoothly.

There was a little time to kill between the shoot and the pick up, but no place to kill it. The locations were just around the corner from one another, but nary a Starbucks or a McDonald’s in sight. We were both a bit peckish since it was past our lunchtime, but we were forced to go from one place to the other without so much as a tater tot.

It was a quick handoff. Once the boxes of photos and memorabilia were safely stowed away, we started looking for food. We’d about decided we’d just go home and eat our leftovers when a Sonic came into sight. We pull into a stall, only to be told nothing was working. The food gods were not on our side.

The leftovers were back in play, until a Jason’s came into view. A Rueben for Bill and a Light Loaded Potato for me. Time to head home to pack.

A Hitch in our Get Along

So, it’s a little before 4. I’m driving us home and I take our exit off the George. As I go up the ramp to take the split for I-30 E, I realize there is something very, very wrong. The ramp is backed up to the split and the eastbound traffic is backed up as far as the eye can see in both directions. Welcome to the Rockwall Bridge!

Two hours later we’re being directed off the bridge at the DalRock exit to join the rest of the traffic trying to sort itself out. As we made our way across the 66 bridge, Bill decided Wayz would find us a shortcut. I am not a fan of Wayz. I have my little ruts I drive in and I like them, but I’m too tired to argue when he tells me to turn on Lakeshore. We made a few more turns and suddenly I am faced with the prospect of turning onto 205 without a light. I put ‘er in park and told Bill it was his turn.

It’s 6:30 now. I have a load of texts to answer and photos to send to the editor, but I’m not even home yet. How exactly am I supposed to pack for our trip? The short answer is that I wasn’t.

The hitch in our get along stayed with us through the next morning. My phone was blowing up. A lot had to do with our accommodations in Galveston, but there were also new appointments to book, which is not usually the case on a Sunday morning. It’s a bit difficult to pack when your phone is going off every 3 minutes.

Long story short, it was noon before we got away from the house. We were hoping to get away earlier, because Bill wanted to get some of the shots out of the way for the rental property we’d be shooting. Some of the interiors for instance, where we’d be spending our time or perhaps the twilight shots. But of course, that’s not how it turned out.

Going to Galveston

This trip had its inception at a Polka Dot meeting back in the summer. A friend with a short term rental in Galveston was making some changes to her property and wished Bill would shoot it, because no one down there had his eye. I told her if she’d put us up at her place, we’d be happy to shoot it for her. She said it would probably be September and that was cool.

September passed and so did October. By November it had fallen off our radar completely. So, when she texted me on November 29th letting me know the property was ready, we were taken by surprise. While December is traditionally a slow month for real estate photography, there is a lot on our calendar for the holiday. Also, we needed good weather, for a good shoot – especially since drone work was involved.

We checked the weather and our social calendar to discover December 4-6 would be the optimal dates for those two entities to cooperate. So we booked it. We just didn’t know they were going to close the Bridge down on December 3rd.

My weekend reports are usually a one day read, but I’m just getting started. Come back tomorrow and we’ll go to Galveston!

DFW Metroplex, Photo Organization, Photo Organization Coach, Photography, Scrapbooking

A Passion for Paper

MEMORY KEEPING 101 – DECORATIVE PAPER IS MY FRIEND

Now that you’ve gotten the basic tools and supplies to do your album, it comes time to get some paper. I am personally addicted to paper. It would take me a lifetime to use up all the paper I have, but what did I do last weekend? Bought another book of papers on clearance at Tuesday Morning!

Let’s Start with the Creative Memories Paper

At Creative Memories there are two basic types of paper – Cardstock and Printed Paper. Cardstock is heavy, solid-colored paper that is the same color all the way through. Creative Memories has it in plain and shimmer colors. Obviously, the shimmer has a shine to it and the plain does not. The Printed Paper is thinner and has patterns printed on both sides.

The Cardstock comes in 15-20 basic colors (according to what’s available at the time and 5-7 shimmer colors. You buy it in packs of ten sheets – $1 a sheet for plain, $1.20 for shimmer. They are packaged in shrink wrap. I keep threatening to have a bit of a splurge and buy one pack of each, but instead it seems I’m always out of red, navy, goldenrod or pink. Some colors come and go. Others are a staple you will always be able to buy.

The Printed Packs are $9.50 and they come with 12 two-sided pages in a Ziplock-type bag. They are a bit challenging to me. To begin with, they are rarely available for long. If you see a pack you like, you better buy it immediately. Sometimes they are gone almost as soon as they are offered – especially holiday packs or pretty florals. And if you really like it, you’d better buy at least two packs, because invariably the two patterns you like best will be on the same sheet of paper.

I use both types of papers as the building blocks of my pages. I start with what some folks call the wallpaper. That’s a sheet on the bottom which sets the theme for the page. Most of the time, that’s a printed page, so it is like wallpaper, but for very formal and solemn pages, I am more likely to use cardstock. I’m just not very solemn very often. Then I build my pages with mats, photos, memorabilia and embellishments.

Cheating on CM

As I mentioned above, I don’t stick to CM-only papers. They are wonderful and sufficient to do pretty much whatever you want to do, but as long as the paper is archival (meaning it won’t destroy my photos) I’ll buy it anywhere.

When you leave the CM world you do have to be careful. You run into all kinds of things like printed paper where the pattern is only on one side or where a pattern is printed on cardstock. CM is the gold standard, but there is nothing standard about the rest of them. One big bound book was exactly 12X12 and the pages were quite thin. That meant first it wasn’t heavy enough to use as wallpaper and no matter how carefully you cut or tore out a page, it would never come out 12X12, because part of it was left in the book. Then some of the papers are perforated and if you don’t want the perforation to show, you’ll need to trim it down.

You also must be careful to buy archival paper. It needs to be acid free and lignin free or you’ll end up with paper that will harm your photos. It might look like you could just use construction paper, but if you do, you’ll eventually be very sorry, because the colors will fade and the chemicals will seep into your photos, ruining them. Cute stationary won’t do either. Get scrapbooking paper.

Getting Started

If you are just starting, I’d say chose several cardstock colors which appeal to you, a couple of themed packages which fit in your lifestyle and a mat pack. Or you could come to me and buy single sheets to get you started. It would be easy to spend $100 on papers, but if you let me know your budget, I’ll help you get the right stuff at the right price. While decorative papers are an ongoing expenditure, you will rarely use up all of a color or pattern immediately so you will begin to build your own hoard.

If you follow my suggestions in these blogs, you can have the beginnings of a new hobby for less than $300. That’s a smaller entry into a new hobby than most. Think about what you spend on your kids sports equipment. The sports equipment will be replaced in years to come, but you’ll still have your memories to share in beautiful albums.

I have a lot more to say about paper, mostly about storing it, but I guess you’ll have to come back next week, because I have run out of words for today.

DFW Metroplex, Photo Organization, Photo Organization Coach, Photography, Scrapbooking

Decorating a Traditional Album

MEMORY KEEPING 101 – CUTTING INTO THE FUN PART

After Your Initial $75 Investment

A couple of weeks ago I told you it was possible to get started in scrapbooking for only $75 and that’s the truth, but all you’ve got at that point is a cover, pages and adhesives. If you want more than pictures stuck to a bare page, the next step is Trimmers and Tools. There are just a few basic items you need to get started, but there is a lifetime of fun stuff to collect – and just about the time you think you have it all, they come up with something new that feels as if it is totally necessary.

Two Trimmers

When you begin to decorate your scrapbook pages, there are two primary objects you’ll be dealing with – photographs and decorative paper. Creative Memories has a specific tool designed for each of these jobs.

Decorative paper comes in 12X12 sheets and Creative Memories has an amazing 12-Inch Trimmer I think everyone needs to handle these sheets. The price is $49 and worth every penny. I’ve used lots of trimmers in my decades of scrapbooking, even several versions of CM trimmers, but nothing can compare to this baby.

To begin with, the 12-Inch Trimmer is sturdier than anything else available. This is a tool you’ll use all the time for lots of different things, so you want a good one. When I say it has a double track blade guide, interchangeable safety blades and an easily replaceable mat strip, it probably won’t mean a thing to you, but what I’m saying is that it is well-built, easy to use and there are affordable replacement parts that keep the whole thing going. Because the safety blade is interchangeable, you can not only easily replace a worn out blade, but you also don’t need to get a trimmer for every kind of cut you want to make. You just get blades.

If you can only afford one trimmer, the 12-Inch Trimmer is the one that you want, because it can be used to cut both paper and photos, but if possible you should also consider the Personal Trimmer. It’s a smaller, easier-to-handle trimmer, designed specifically for trimming photos. It’s $26.50. The 12-Inch Trimmer didn’t even exist when I discovered CM in the mid-90’s, so the Personal Trimmer was my first tool and I love it with a passion.

The Custom Cutting System

OK, this is where the fun begins. You do not need a custom cutting system. You can scrapbook forever without being able to cut circles, ovals, hexagons, etc. However, the question is this, “Do you want to?”

I was slow on the uptake for the Custom Cutting System. It cost a little more than I wanted to spend at first and then once I got it, it seemed to slow me down. Then one day they came up with the NEW Custom Cutting System. They made various improvements in the system, from the mat that protects your table to adding a swivel into the blade cartridge. I became a Custom Cutting System fan.

It takes several items to use the Custom Cutting System, all of which can be bought separately. The mat is $15 and you will find yourself using it for many design steps beyond cutting, once you have it. There are a number of pattern packages you can choose, each for $16. You will either get three patterns of the same shape in various sizes, or a single jumbo pattern, or there is a Gemstone set for diamond and heart shapes. The final piece needed is the Blade Cartridges and there are three, red green or blue – each at $7.50.

Here’s how it works. Each pattern has a track on the inside and the outside edge. Each color of cartridge has the blade a certain distance from the feet which go into the tracks. Between the two tracks and three blades, you can make six different sizes with each pattern. Just use the Sizing Template that comes with the patterns to decided which pattern and blade to use. Put what you want to cut on the mat, place the pattern on what you want to cut and then use the appropriate blade in the right track to get the size you want.

If you’re just starting get the mat, the circle patterns and a red blade. That’s a $38.50. You’ll soon want more patterns and more blades, but it’s best to get accustomed to using the system, before adding too much to your stash.

Become a Real Cut Up

I have to warn you, if you fall in love with these, they will be just the beginning of a tableful of tools you think you need to scrapbook. Let me remind you of where you are in your expenditures. You spent about $75 for your album and basic page supplies. The 12-Inch Trimmer is $49 and you are in business for your first album at $124. If you want more, you get the Personal Trimmer and start your Custom Cutting System, which still keeps you under $200. You’ll need to spend about $75 every time you start an album, but the tools will be there for you virtually forever.

Once you have all these great tools, you’re going to need some stuff to cut. So, next week we’ll talk about Decorative Papers and Embellishments.

DFW Metroplex, Photo Organization, Photo Organization Coach, Photography, Real Estate Photography, Restaurants & Bars, Road Trips, Scrapbooking

The Weekend Report

TRAVEL HERE – THIRD WEEKEND IN NOVEMBER & AUTUMN IS DEFINATELY HERE

I hope you and your family had a wonderful Thanksgiving celebration yesterday. While last weekend was fairly busy, there’s not a lot that will be interesting to you. However, we did try out a new restaurant on Thursday and on Friday I did have one thing worth mentioning.

Finally Four Winds

So, shortly after we moved to the Rockwall area, we started hearing about a steak restaurant called Four Winds in Wills Point. We also heard that to get a reservation there, you needed to book a month in advance and you’d still be lucky to get in. We’re fairly spontaneous about our dining out and steak is something we usually cook at home, so even though folks raved about the food, we had not made any serious attempt to go.

Still, we kept hearing about it, so we’d begun to look for a reason to make a reservation and go. That’s when one of those people who want to sell you annuities sent us an invitation for a free meal at Four Winds in exchange for listening to her presentation.

I’m warning all of you people who offer up time shares, vacation clubs and financial plans, Bill and I are very good at ‘no thank you’. We actually consider the presentations a sort of entertainment and feel no compunction at leaving without setting an appointment or buying any thing at all. Remember, you contacted us. We didn’t come looking for you.

A free dinner at one of the most popular restaurants in the area? That’s a no brainer. I won’t waste your time with the annuity bit, but I will tell you Four Winds made listening to the spiel worthwhile. Both of our steaks were noteworthy and the side dishes were good too. I’m sure we’ll find a reason to go back and we won’t even mind paying for it ourselves!

Wine, Women & Wealth

One of my dear friends, Susan Bennett-White is a financial consultant. She handles all kinds of things from a program to save you money on the things you buy every day, to being able to help you get your finances in order to buy that house you want or even what kind of life insurance you need. Once a month she has a program directed at educating women, which as a group are generally underserved in the financial arena. It’s called Wine, Women & Wealth.

Besides being a good educational vehicle for women concerning their personal finances, it’s also a great networking event – that’s why I’m there. The meal is free, the event is fun and while it’s obvious Susan would love to have your business, there is never any pressure to buy, from Susan or from the various businesses – one of which is spotlighted each month. Just so happens this month, my memory keeping business was the spotlight.

So, in the photo above you see me, begging people to turn their mess over to me and let me turn it into memories they can share with pride. We’re at Alfredo’s Steakhouse in Forney, TX. Since I go there once a week for FANG, Forney Area Networking Group (Networking you can sink your teeth into) once a week and then once a month for Wine, Women and Wealth, it just might be the restaurant I go to most frequently, but even though it’s a steak house, all I ever get is breakfast, a salad or a sandwich.

I’d love to connect you with Susan and her monthly free lunch and networking event, so just let me know if you’d like to be invited next month.

Wedding Bells and Sunday School

The only other place I went this past weekend was church and I went twice. One of the sweetest girls in my church married the love of her life there on Saturday. It was a very tender event. Then, of course, on Sunday morning I got up and went to church. I happened to be the greeter, which meant I froze my patookus off, there in the breezeway of Rockwall Bible Church.

Otherwise, I took care of a few real estate photography clients, designed and ordered my company Christmas cards, finished a digital photobook and ordered it, started another one and tried to deliver a pair of scrapbooks I had finished, but my client got caught up at the mall. Not very exciting, huh?

I actually was away from the house for less than half an hour, because my client caught me before I got too far, but when I got home all hell had broken loose. My husband had decided to build a few shelves in the attic, for which I am sincerely grateful, but many of my “treasures” (translated that means “free tote bags” were in danger, because he wanted to “organize” (translated that means “dispose of”) them.

And really, that’s it! Next up, learn about Las Vegas’ High Roller Ferris Wheel and then on Thursday, we’ll be talking about the digital side of my memory keeping business.